Modeling & Materials

Weekly Design Challenge Template

Chengyu Yang - Interaction Design, Year 2

Weekly Formstorming design challenges for DESN 27425. Each challenge is a 5x5 grid of 25 iterations: photos of real objects and screenshots of my 3D modelling process. Click any image for a description.


Module 1


Module 1 - Stuff: Objects as Data. Selecting everyday objects (5 primitive shapes + 3 complex ones), photographing them, and learning 3D modelling by re-creating one of them. I started with Blender 5.2 while waiting for my Cinema 4D licence, and modelled a reusable coffee cup from a cylinder primitive. In Design Challenge 2 I compared AI 3D generation (Tripo) with modelling by hand in Cinema 4D, focusing on a game controller and a djembe drum.

Design Challenge 1

Objects as Data: 8 everyday objects photographed, and a reusable coffee cup modelled in Blender 5.2. The first 11 images document my modelling process step by step; the rest are my object photos.
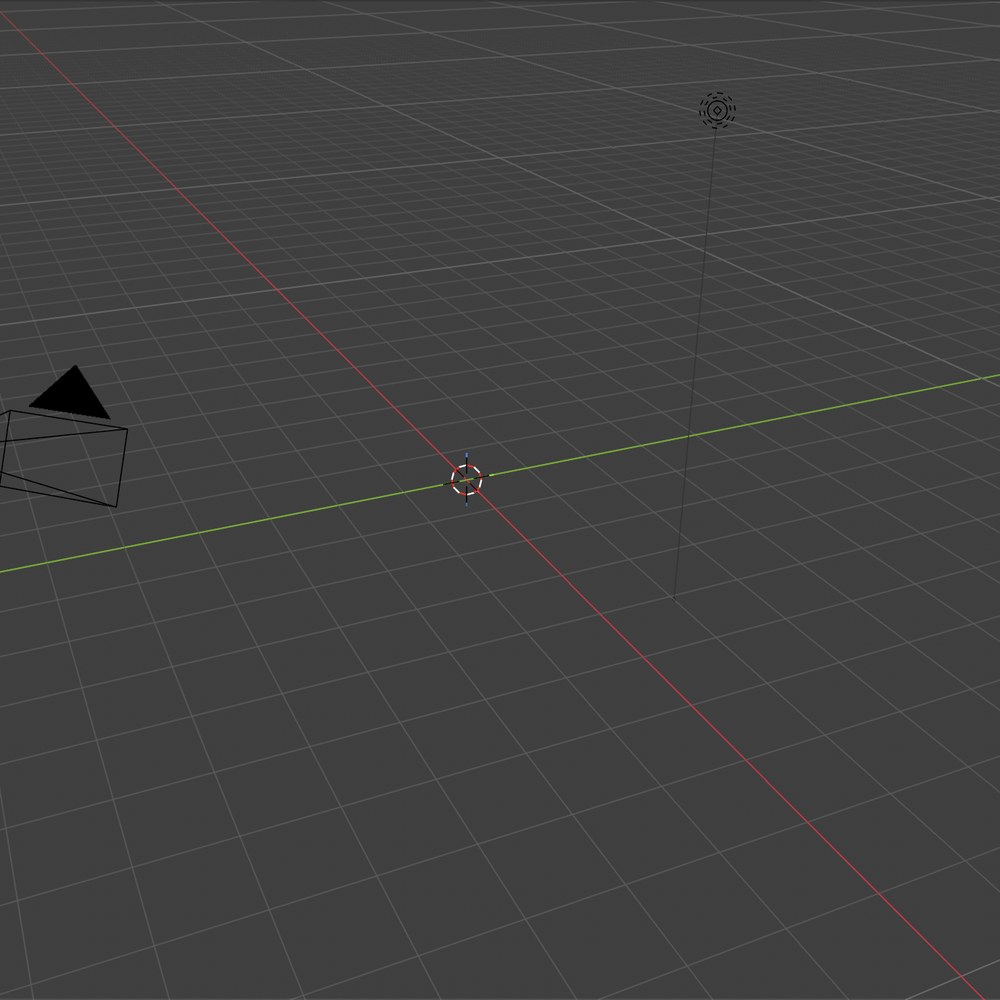
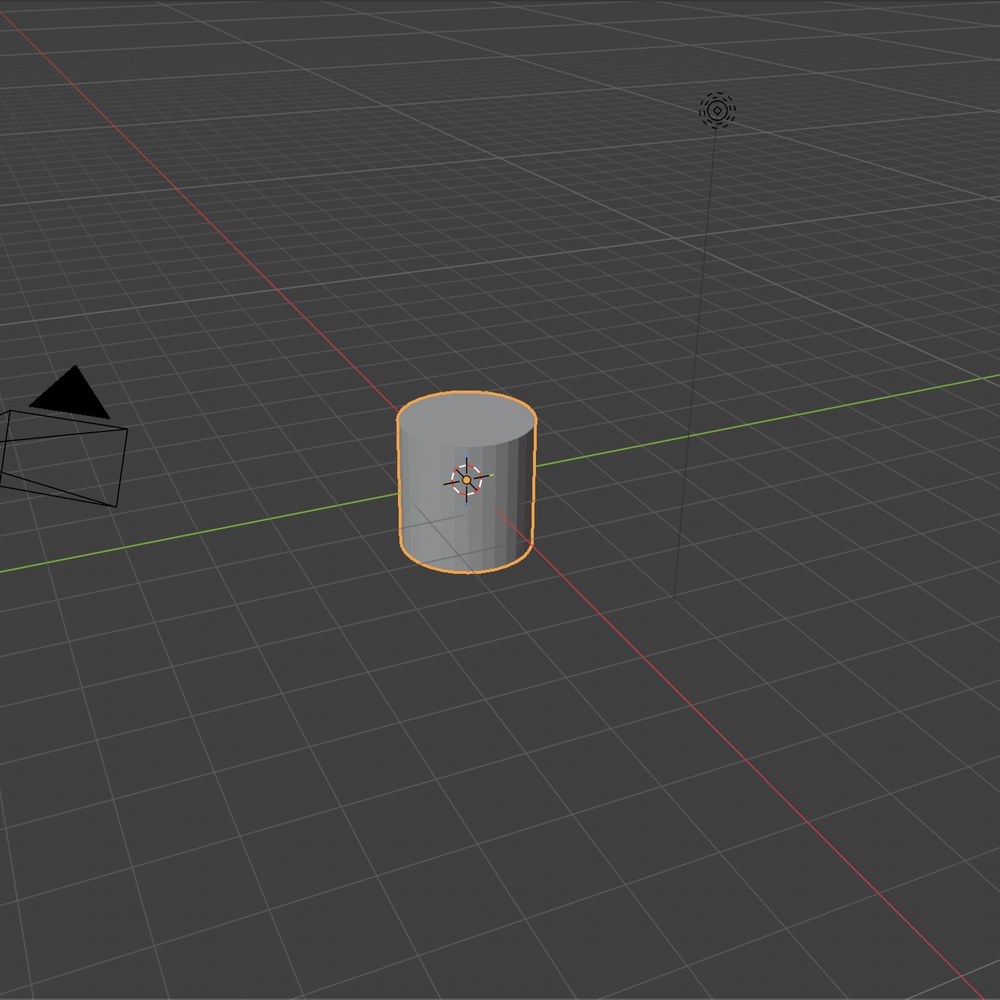
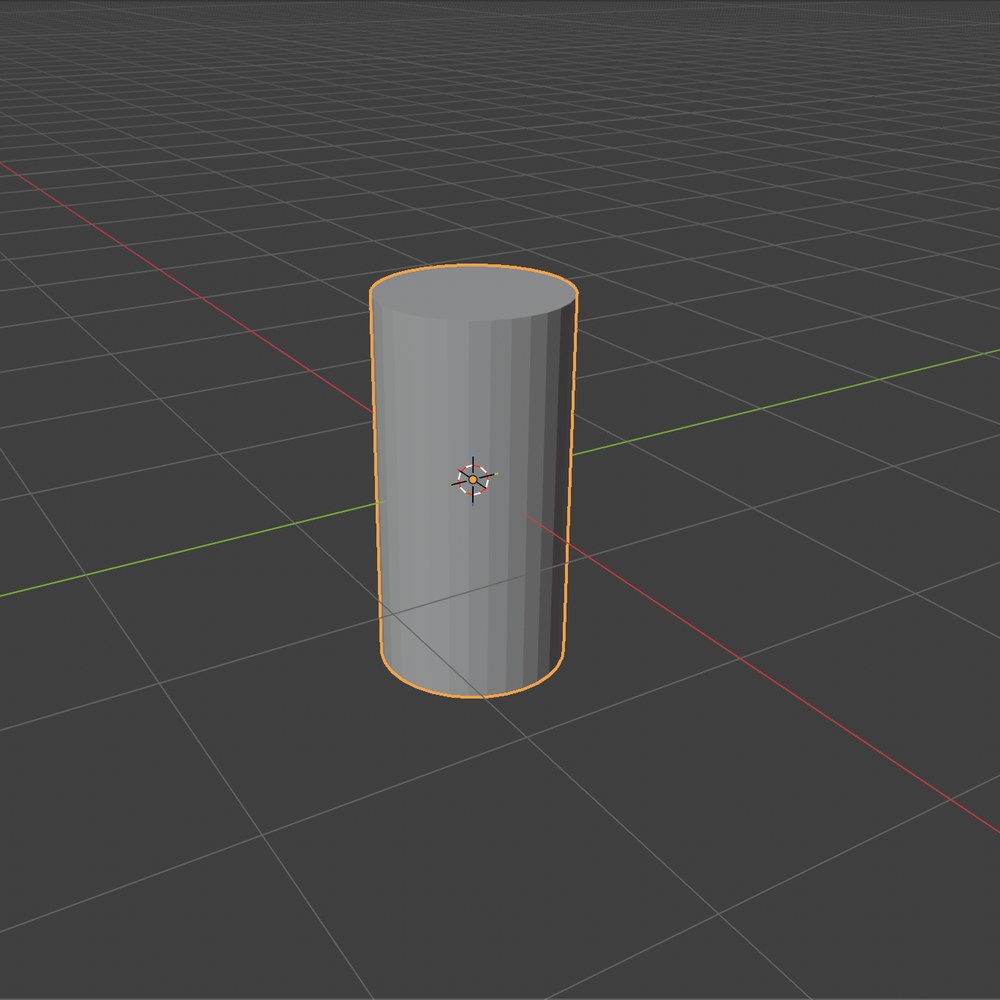
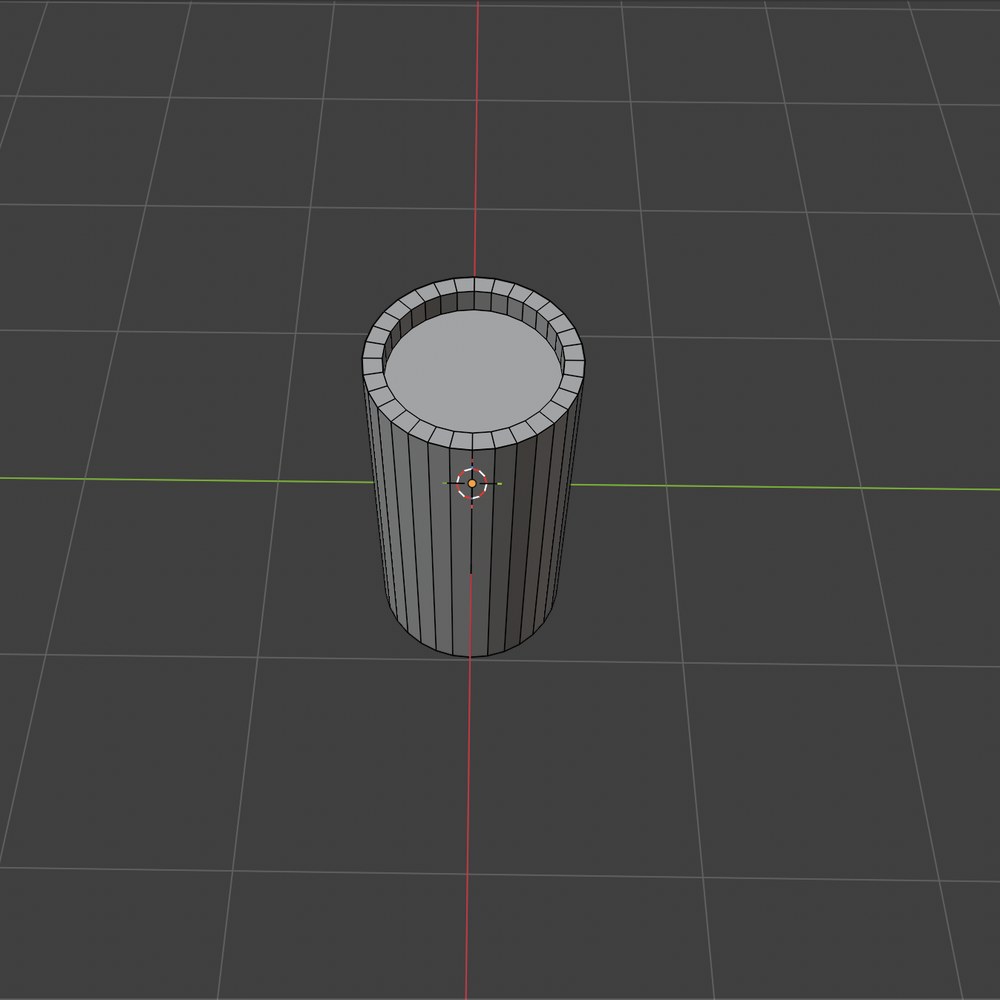
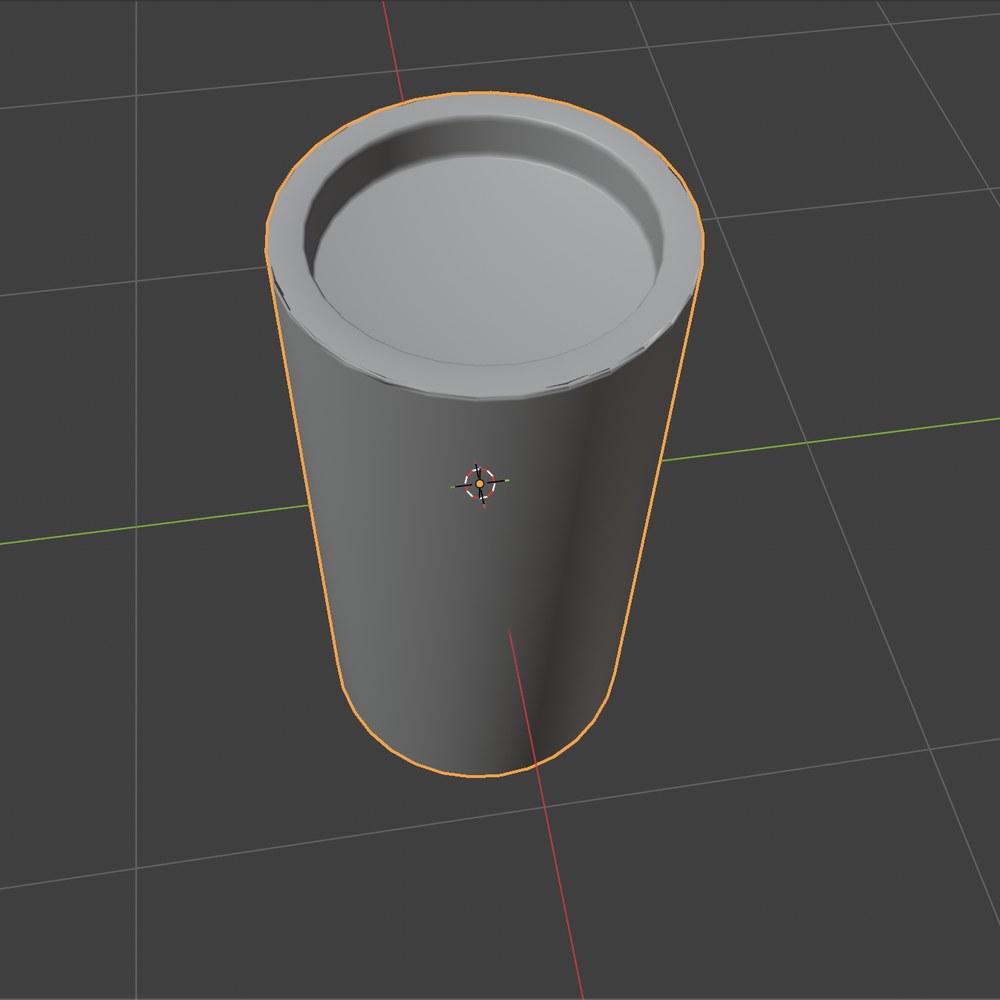
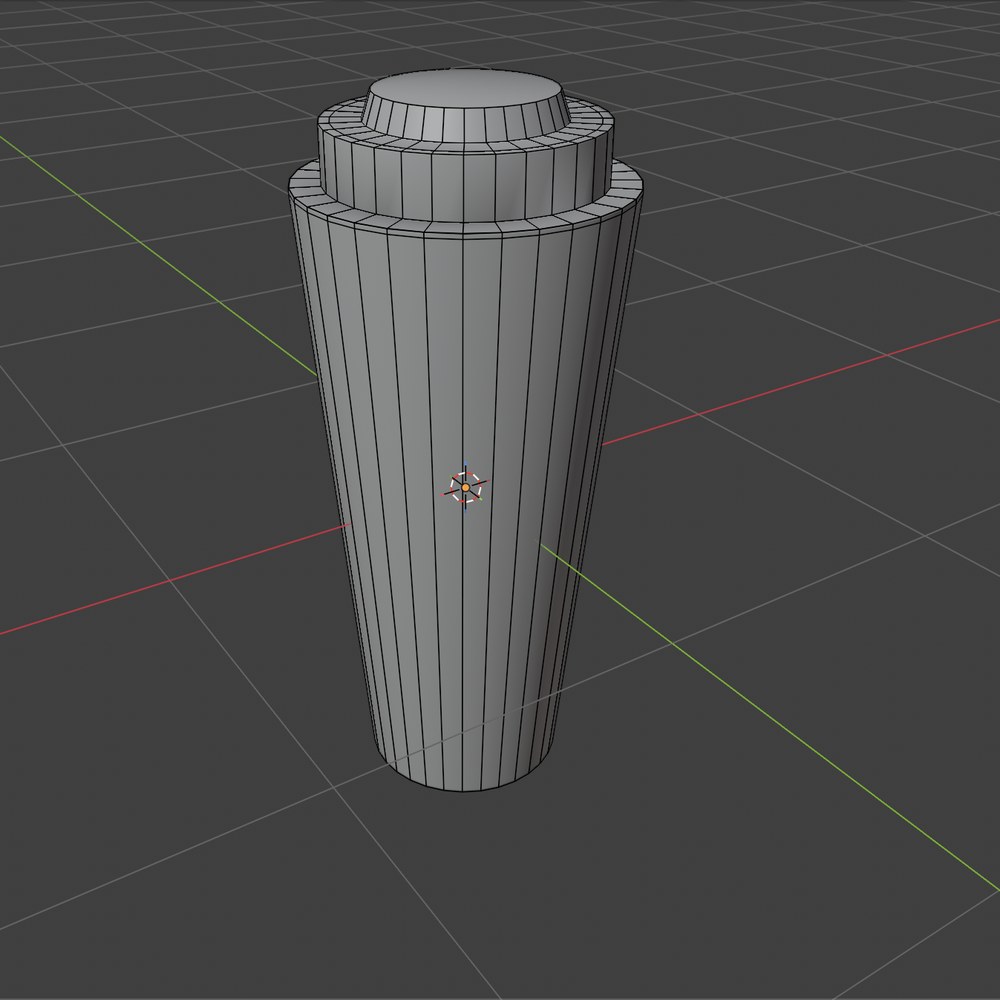
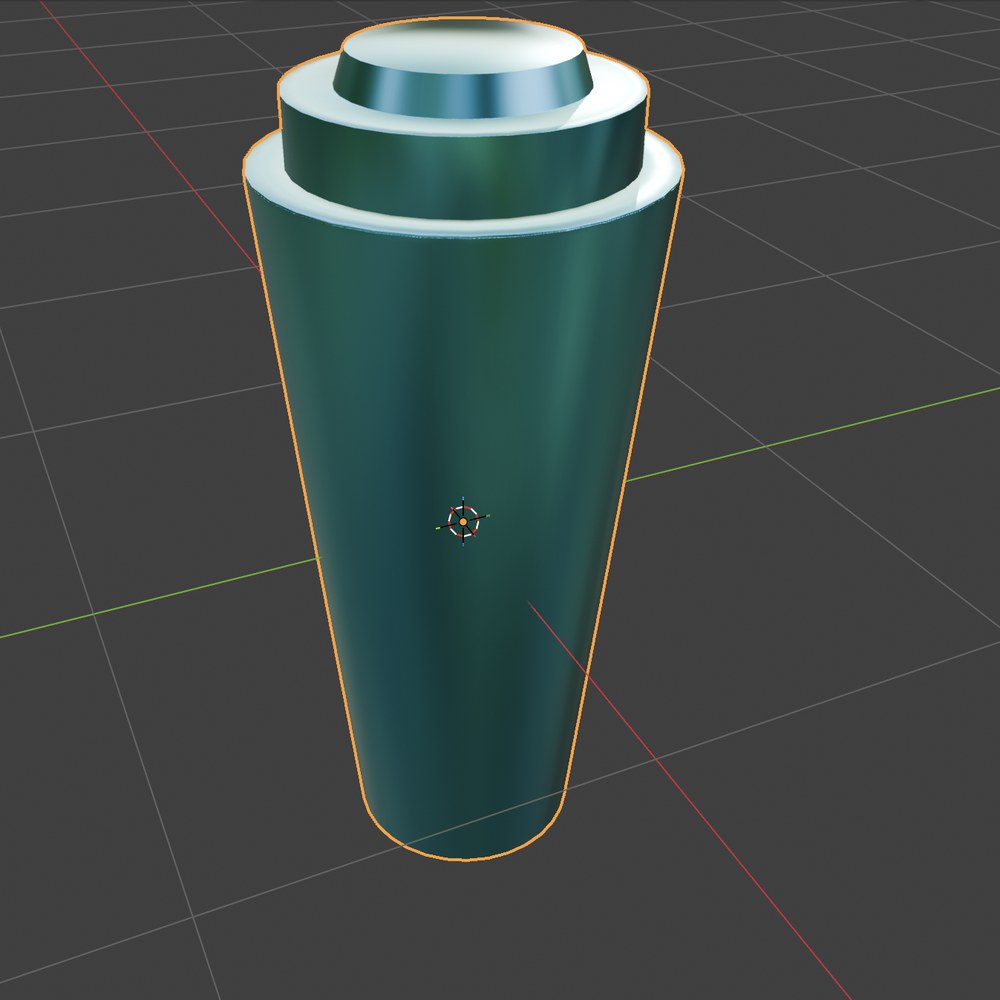
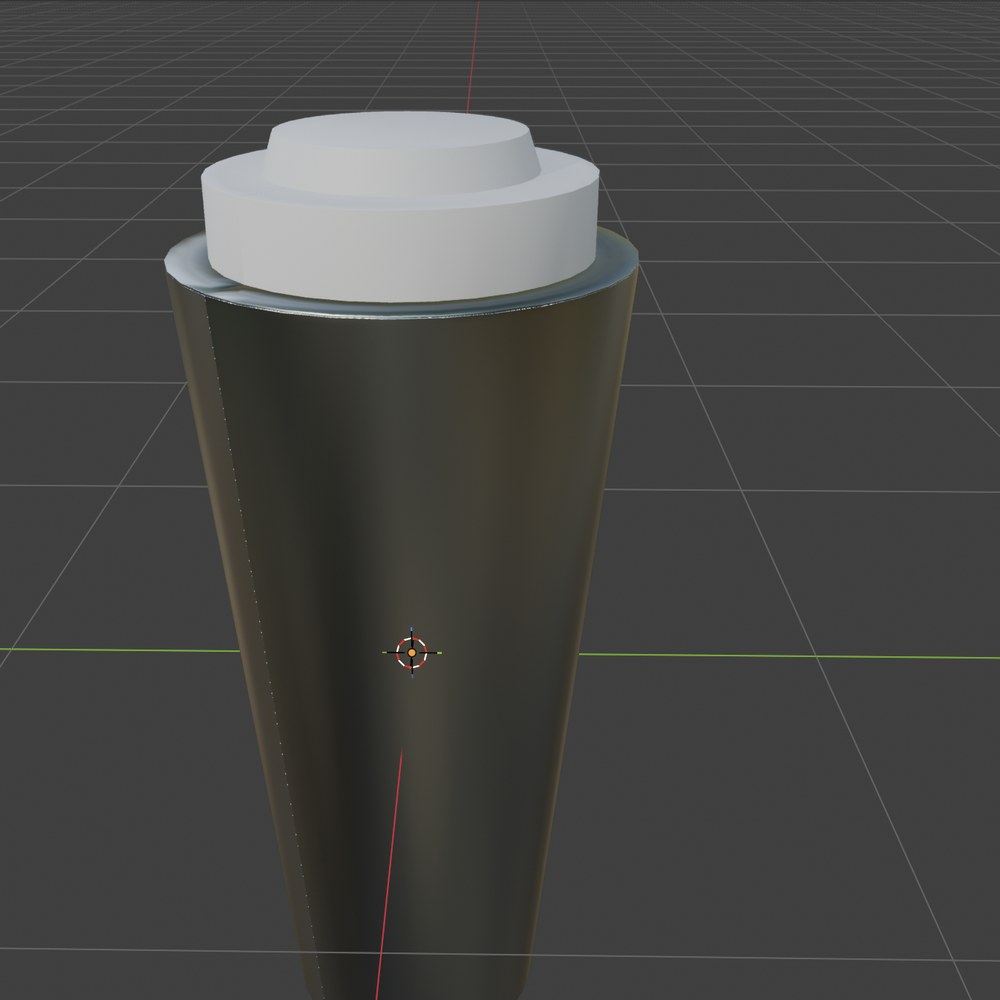
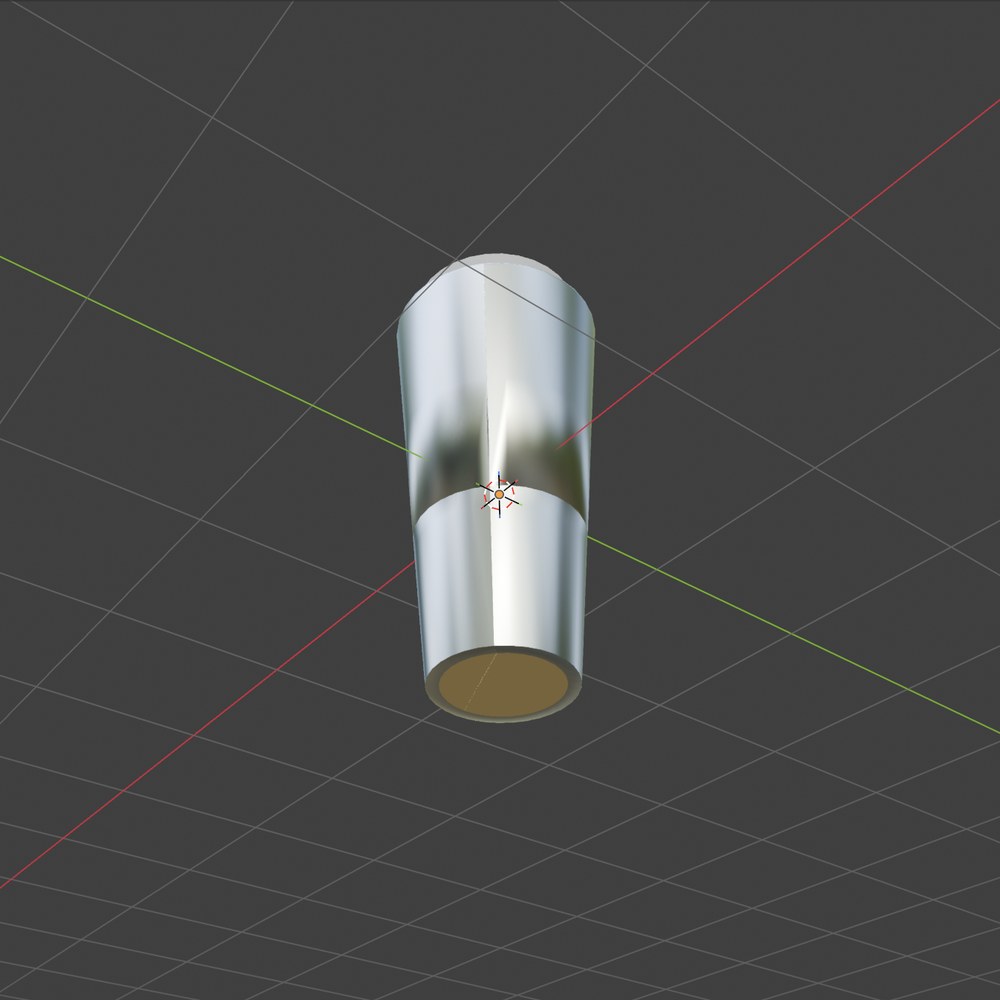
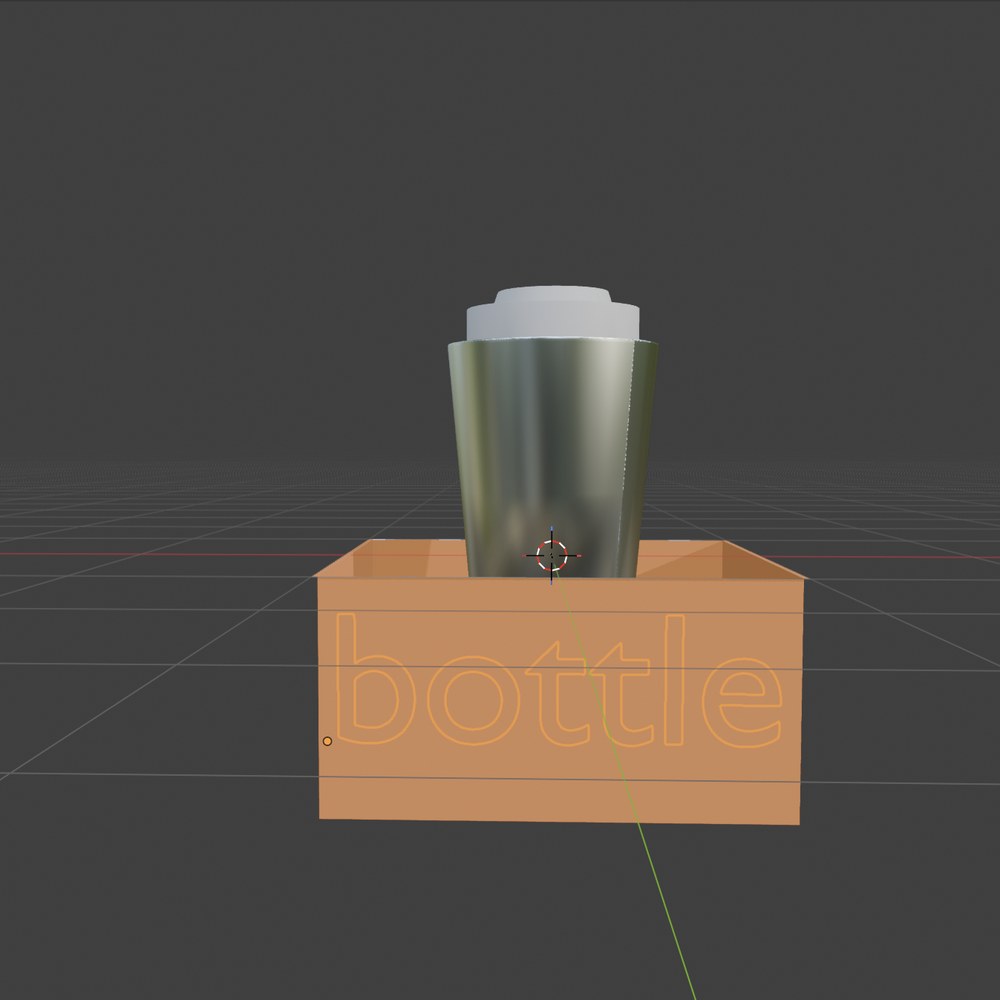
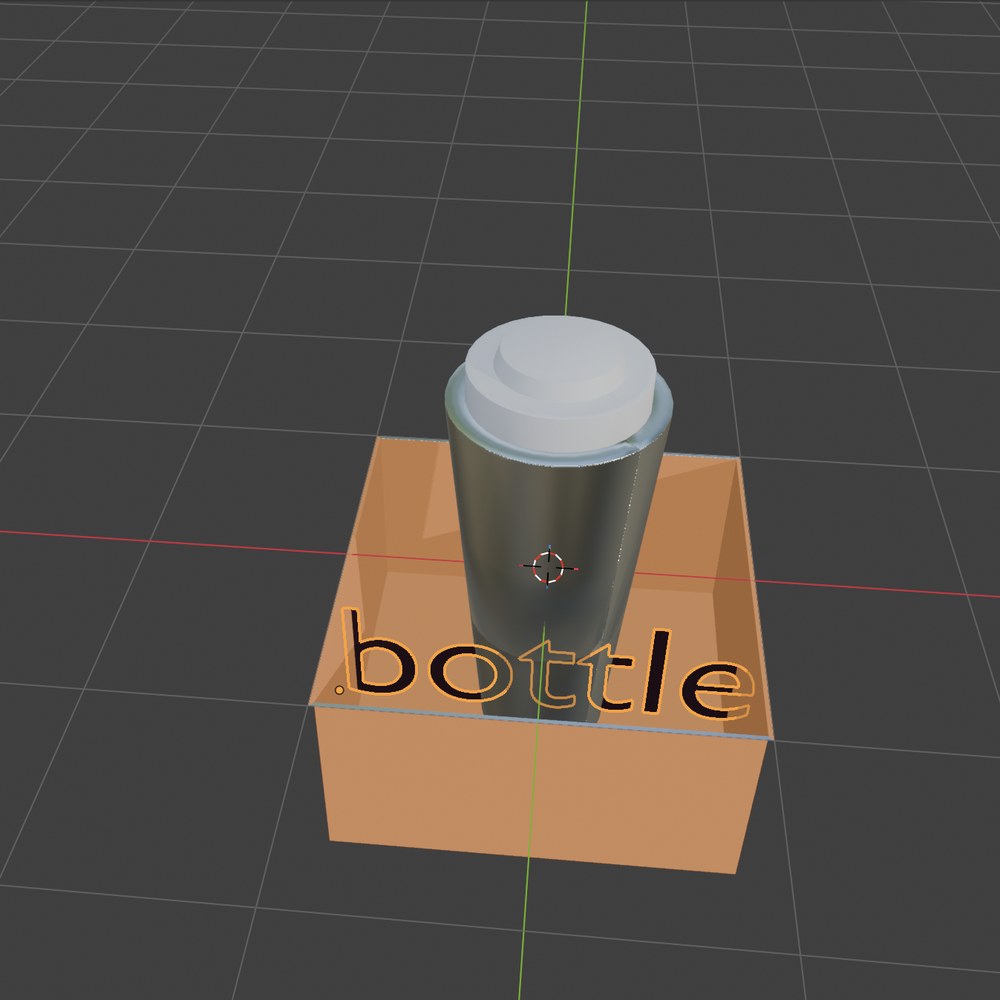
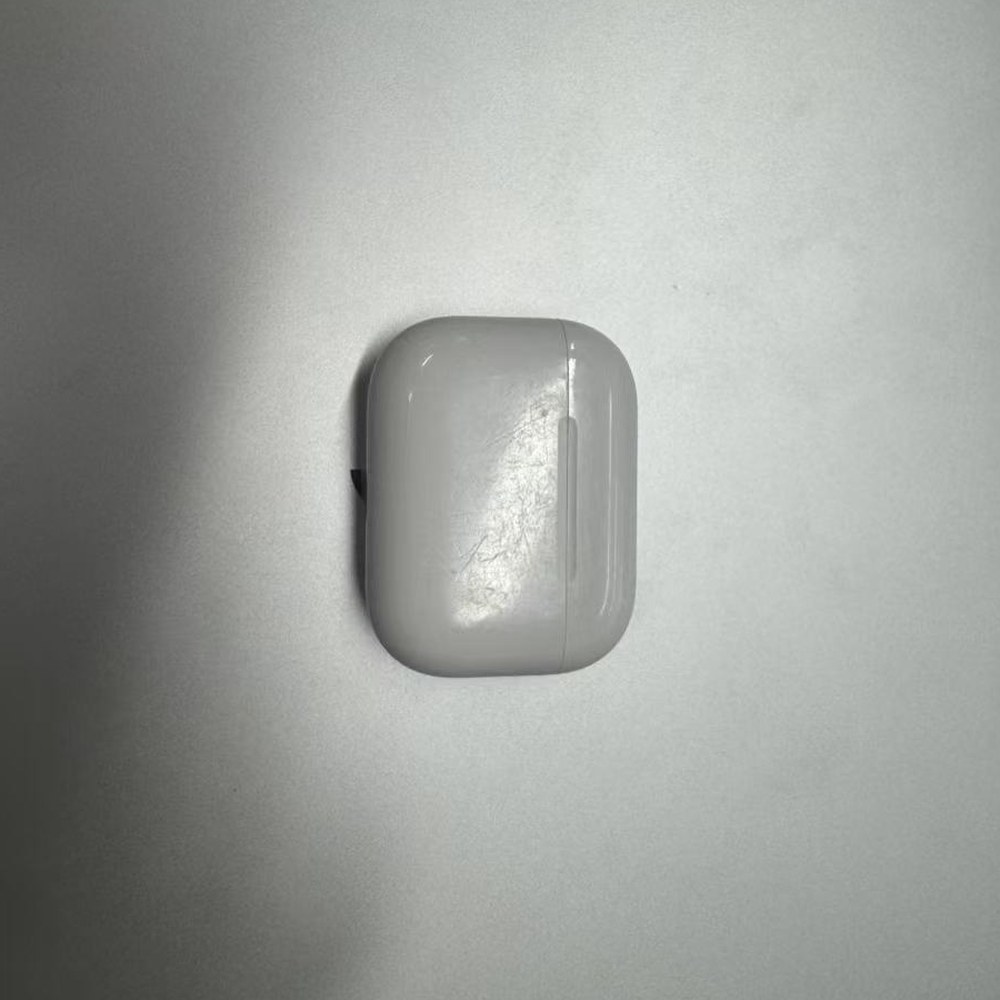
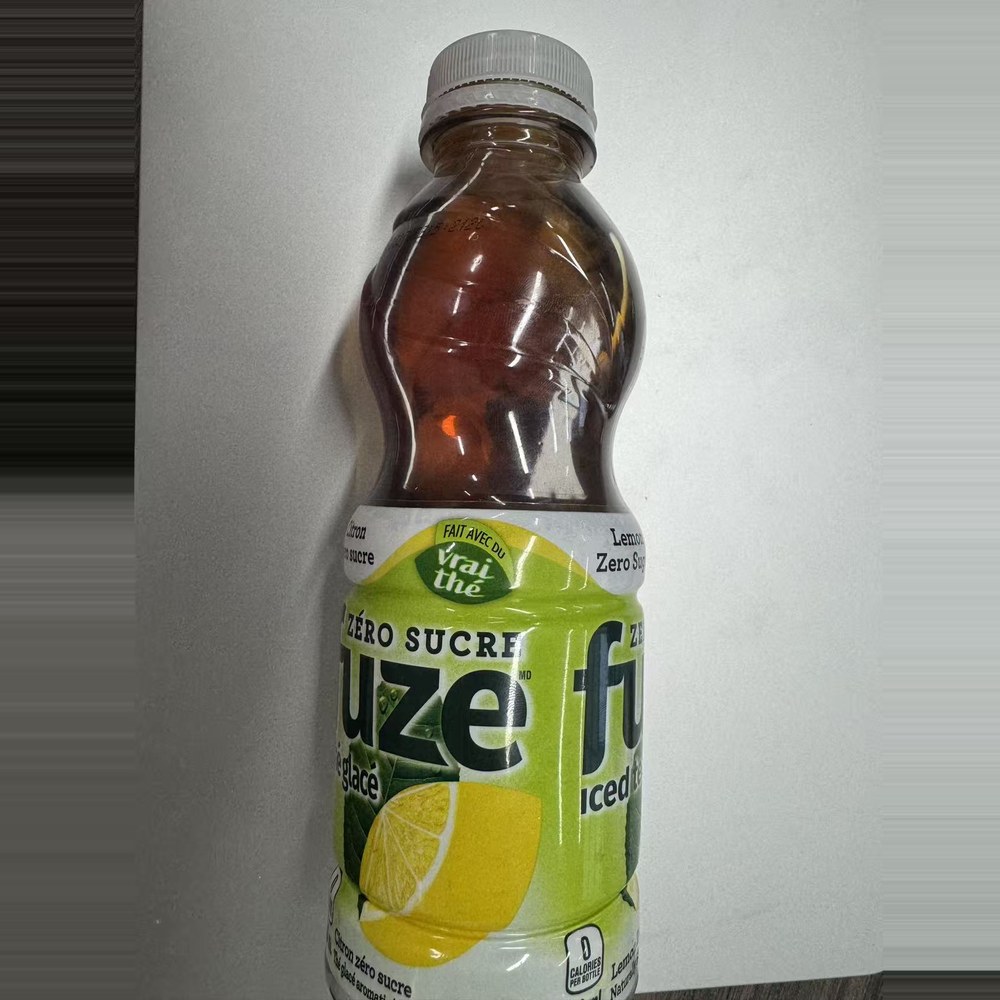
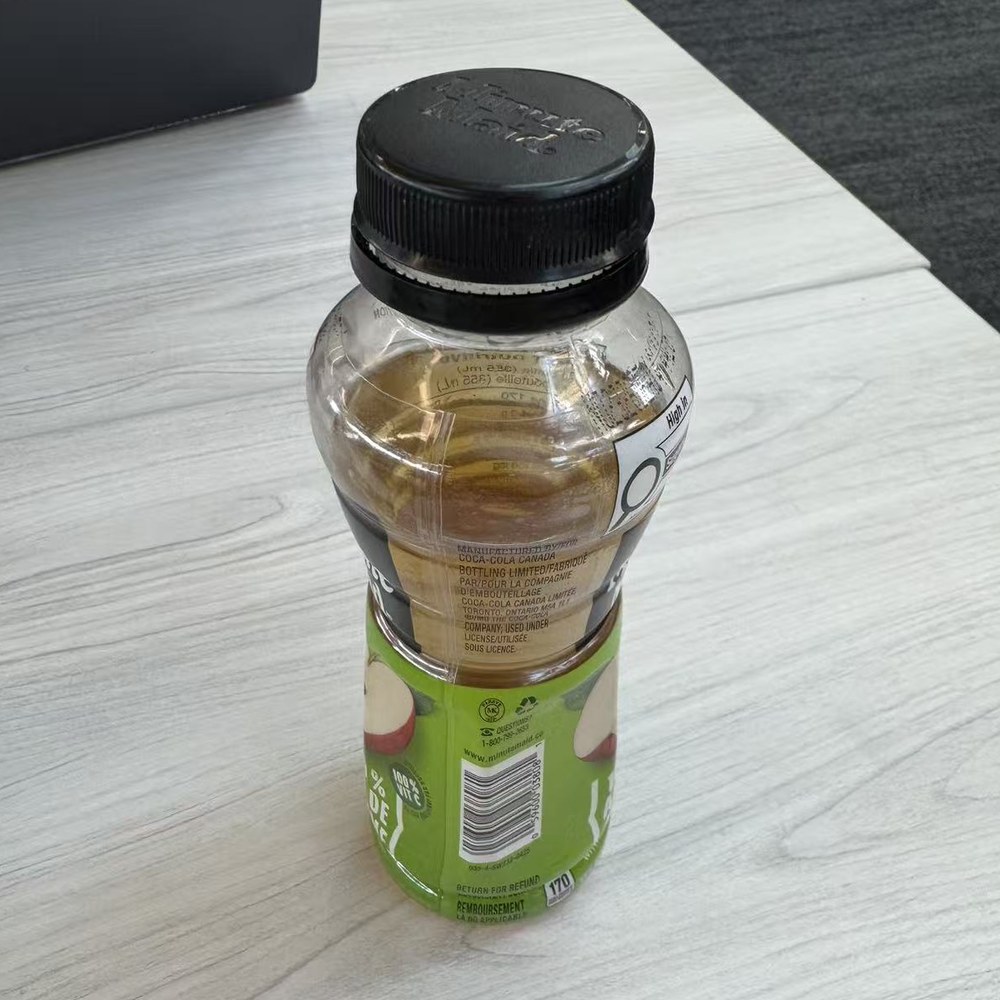
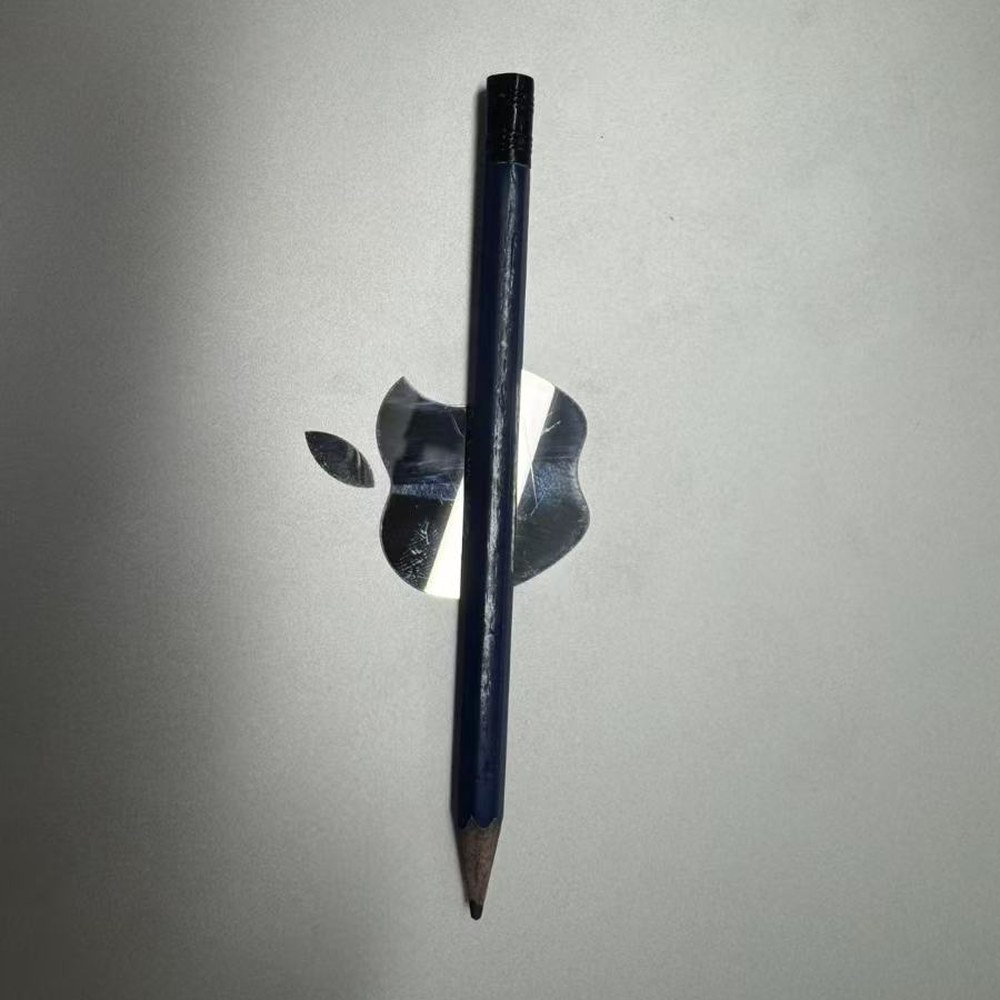
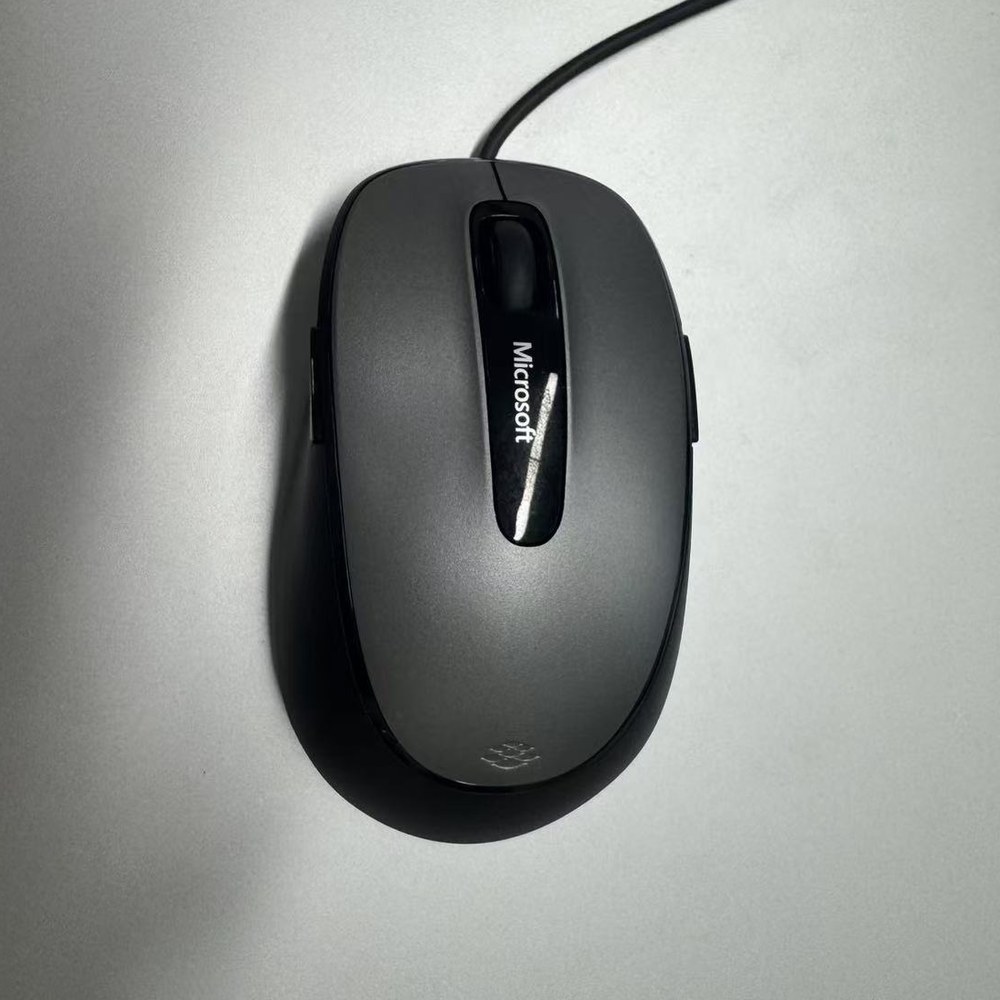
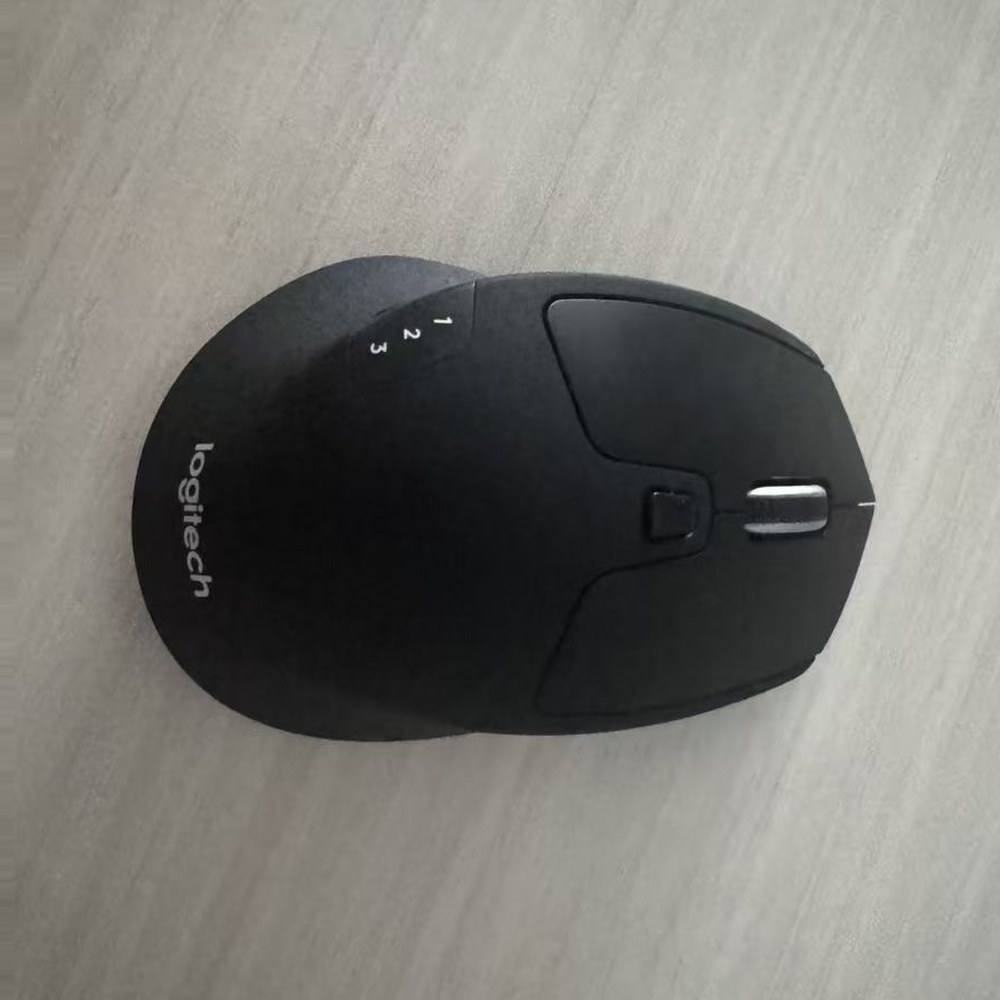
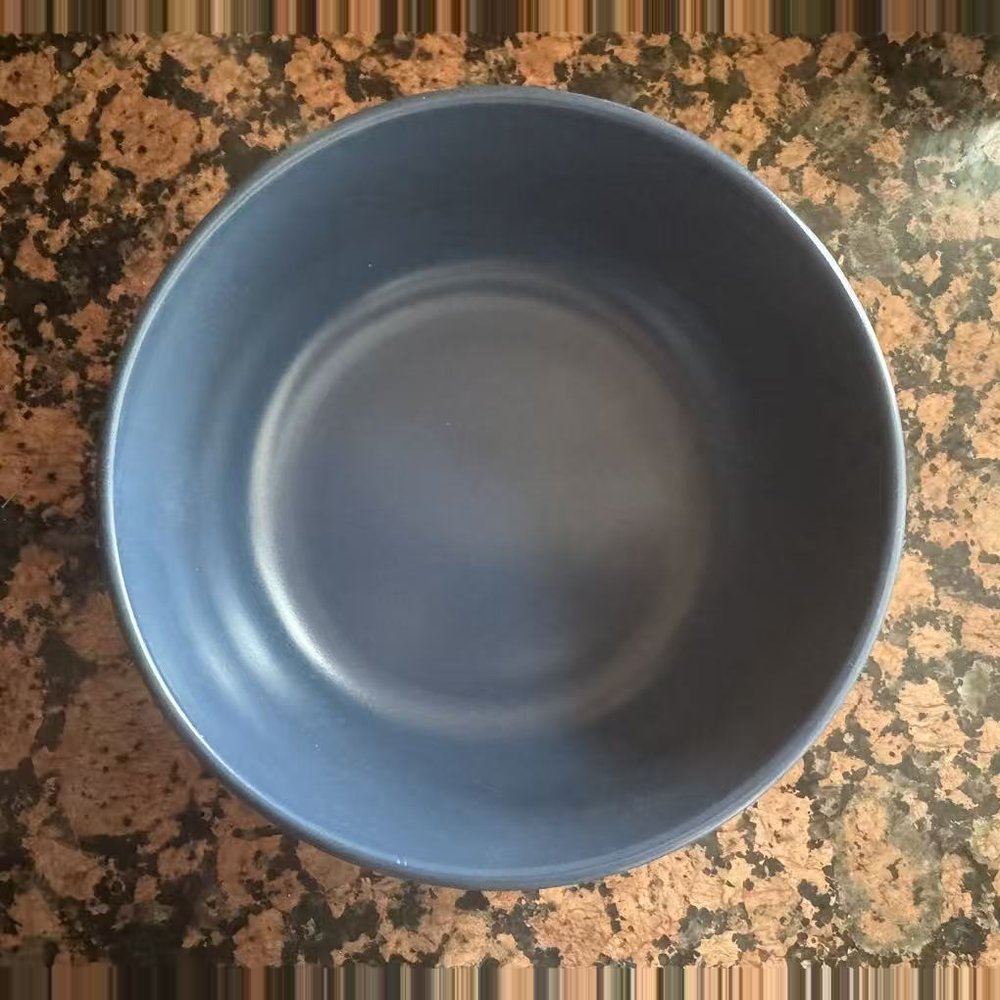
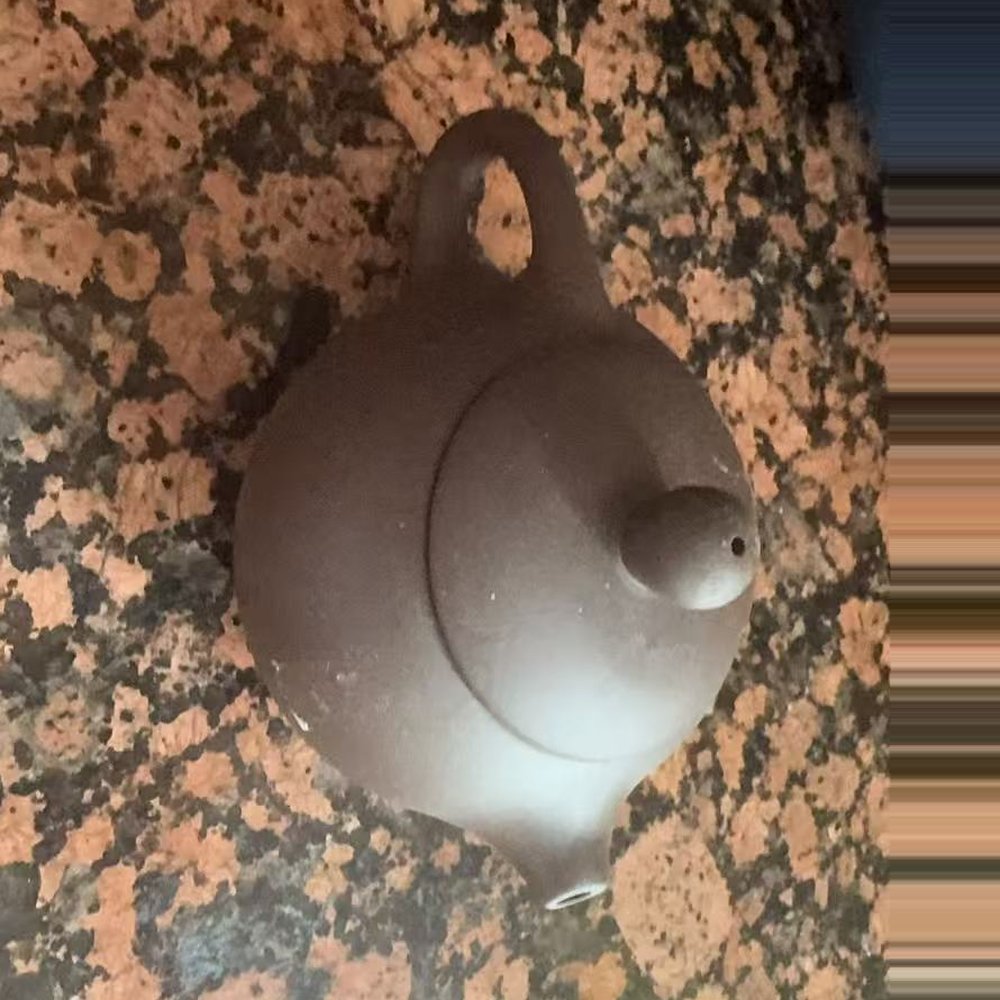
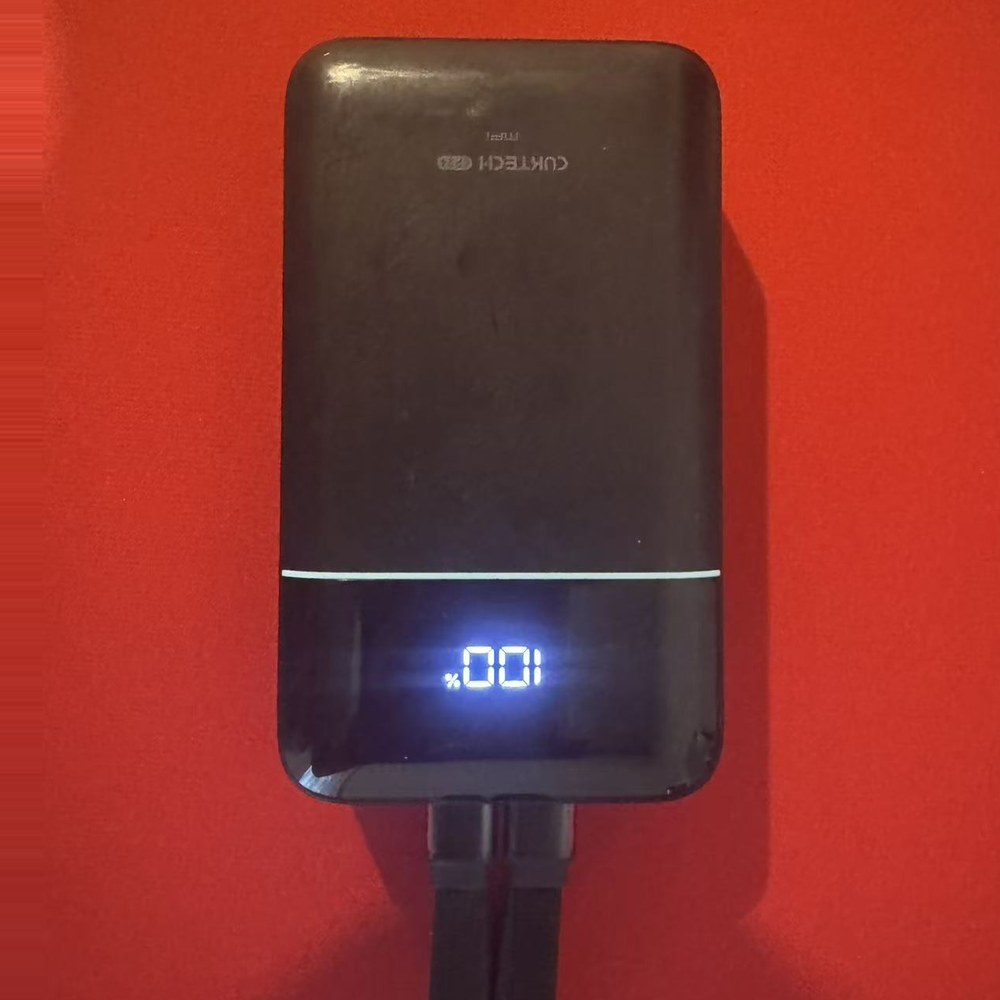
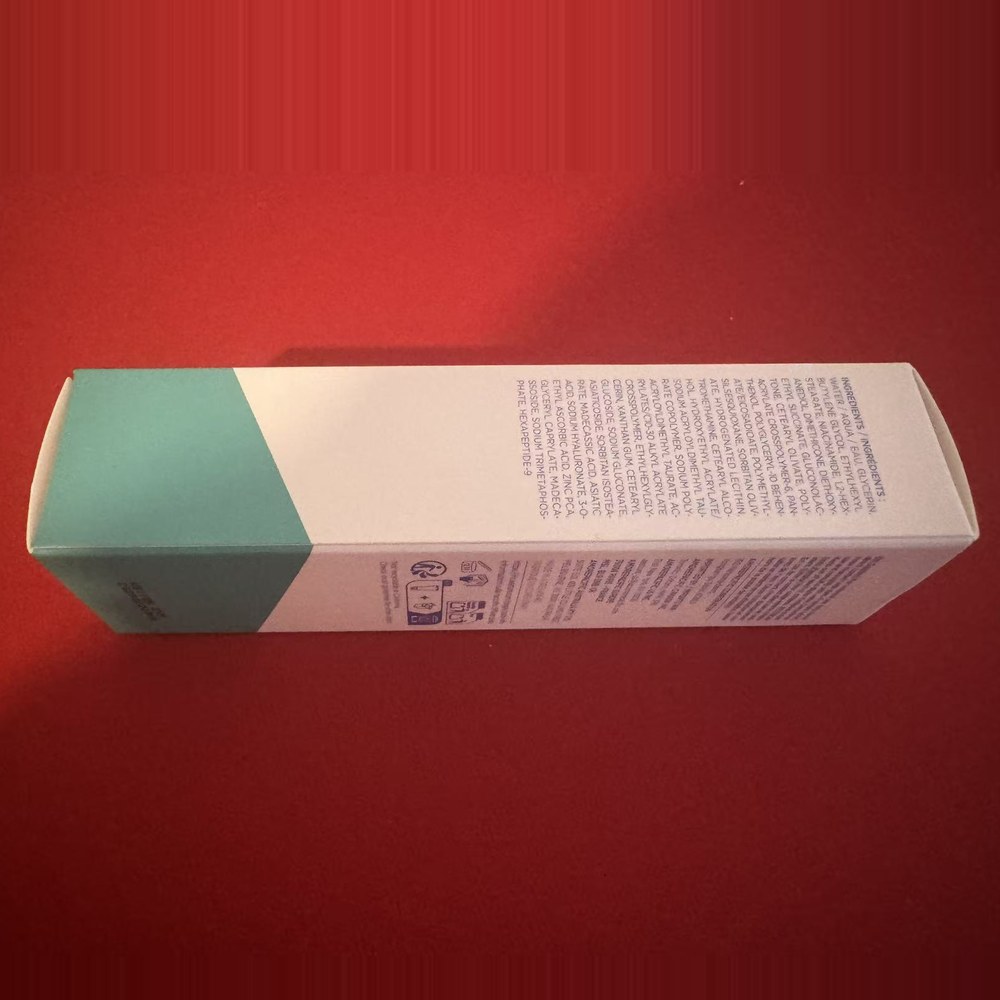
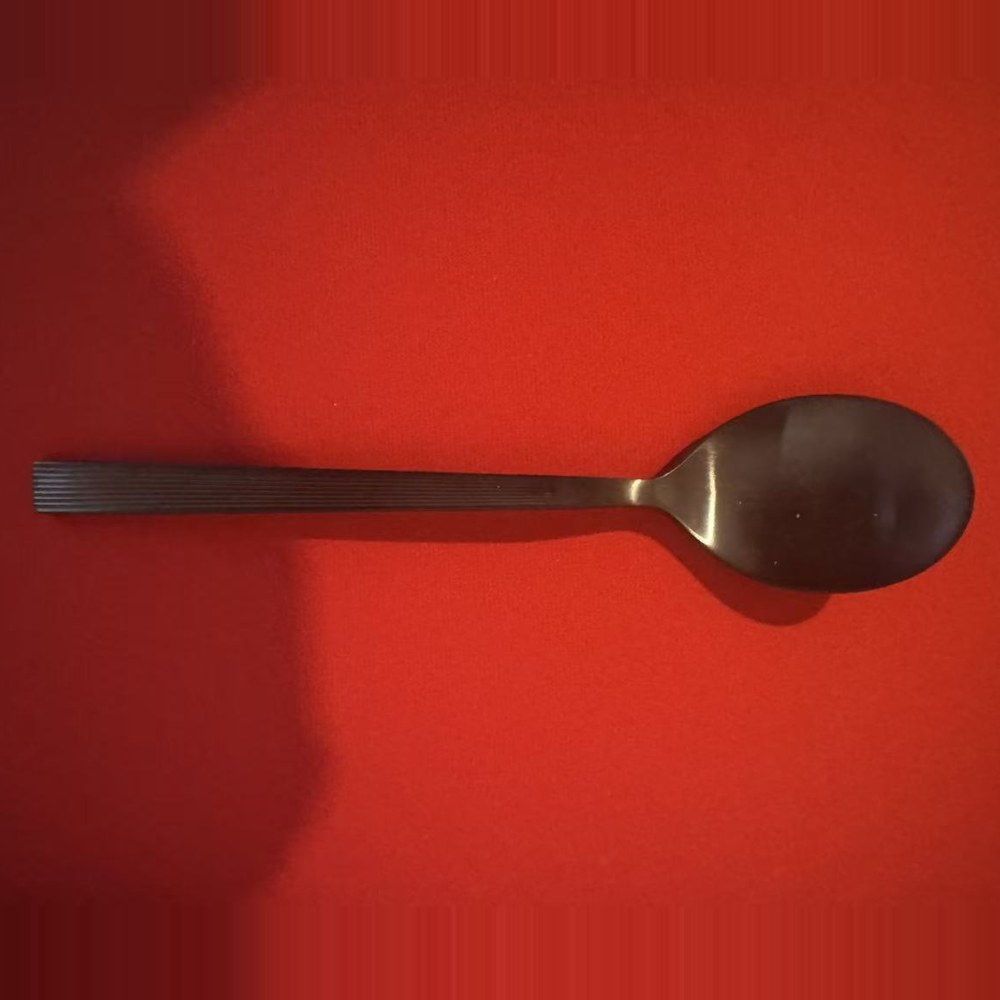
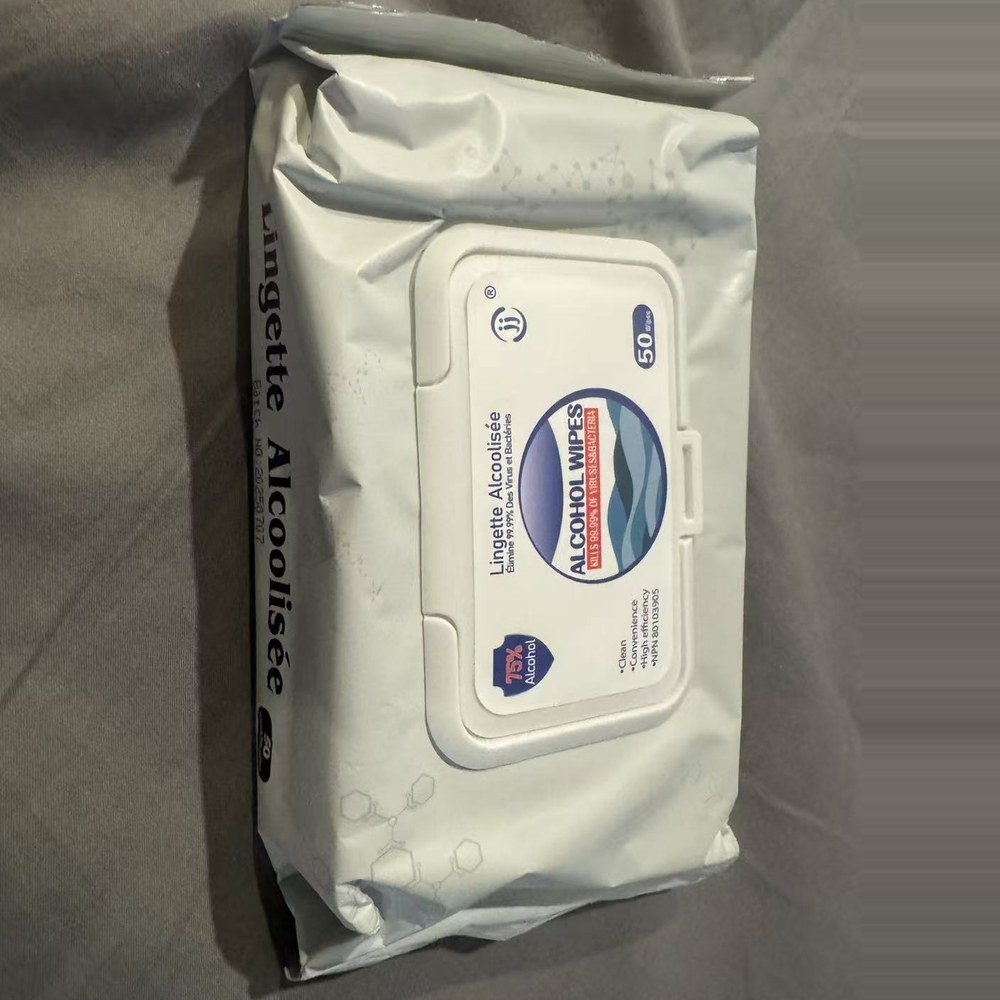
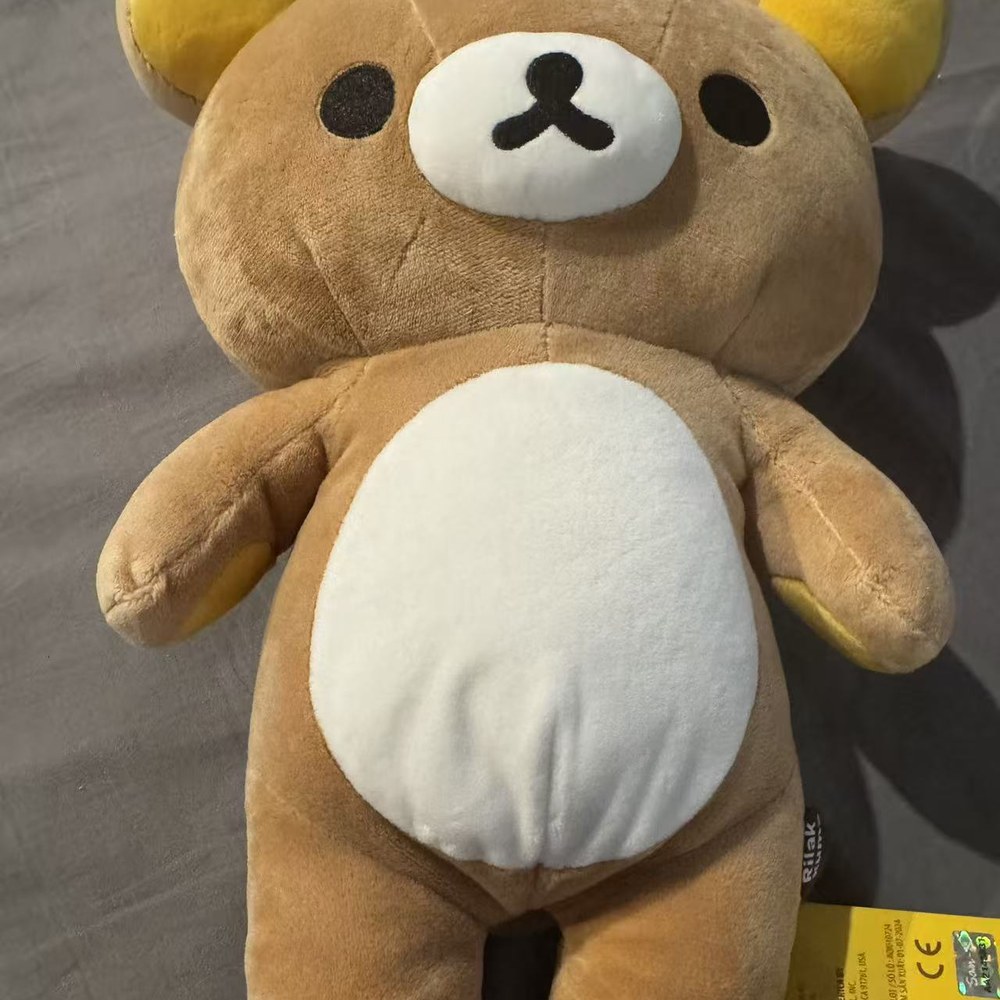
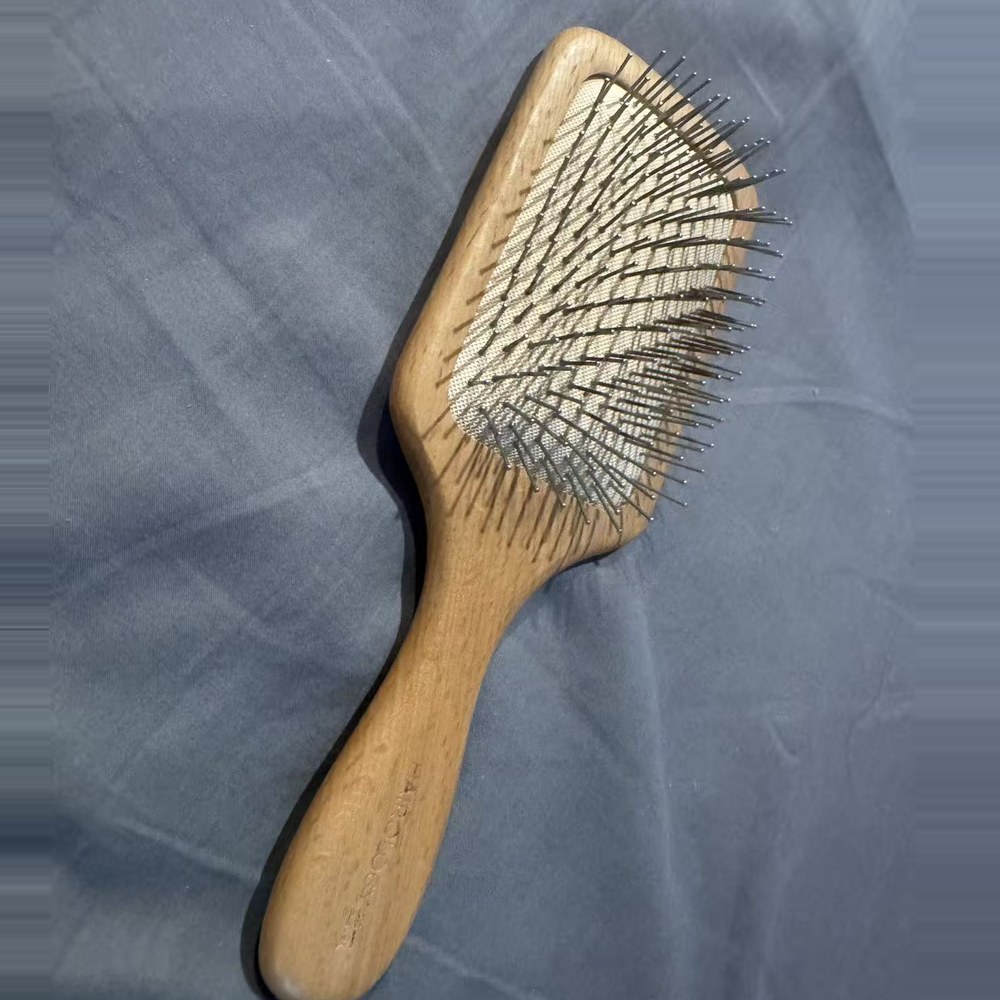
Step 1 - Opening Blender for the first time. Empty scene with the default camera and light, before switching the interface to English. Step 2 - Added a Cylinder primitive (Shift+A -> Mesh -> Cylinder). The starting shape for the cup body. Step 3 - Scaled the cylinder to 0.5 on X and Y to get a tall cup proportion. Step 4 - Edit Mode: inset the top face (I) and extruded it down (E, Z) to create the recessed rim. Step 5 - Added a Bevel modifier and Shade Smooth. The hard edges became rounded and the faceted surface turned smooth. Step 6 - Extruded the top in several stages to build a stepped lid, and tapered the body so it is narrower at the bottom. Step 7 - First material: teal metallic (Metallic 1.0, Roughness 0.3) in Material Preview mode. Step 8 - Two material slots: dark metal body and a matte white plastic lid (Metallic 0, Roughness 0.6), assigned to separate faces. Step 9 - Material exploration: chrome body with a paper-like base (Roughness 0.9) to test contrast between materials. Step 10 - Added a cardboard box and 3D text (Add -> Text) to give the cup a context, testing a paper material on the box. Step 11 - Final composition: brushed-metal cup with white lid sitting in a cardboard box labelled 'bottle'. Object 1 (cube) - AirPods Pro charging case: a rounded rectangular box, basically a cube with soft edges and a hinge line. Object 2 (cylinder) - Fuze iced tea bottle: a cylinder with a pinched waist and a ribbed cap. Object 3 (cylinder) - Minute Maid juice bottle: a shorter cylinder with a wide black cap and a label wrap. Object 4 (cylinder) - Wooden pencil: a long, thin hexagonal cylinder with a cone tip and metal ferrule. Complex object 1 - Microsoft wired mouse: curved shell, scroll wheel, side buttons and a cable. Complex object 2 - Logitech M720 wireless mouse: asymmetric body with a thumb rest, multiple buttons and a metal scroll wheel. Object 5 (sphere) - Matte blue ceramic bowl: a hemisphere, the lower half of a sphere with a flat rim. Complex object 3 - Yixing clay teapot: a spherical body with a lid knob, a curved spout and a loop handle (torus-like). Object 6 (cube) - Cuktech power bank: a rounded rectangular block with an LED display and two built-in cables. Object 7 (cube) - Skincare product box: a long rectangular prism, basically a stretched cube. Complex object 4 - Black stainless steel spoon: a flat ribbed handle flowing into a curved, hollow bowl. Object 8 (cube) - Pack of alcohol wipes: a soft rectangular block with a hard plastic flip lid. Complex object 5 - Rilakkuma plush: a soft toy with a round head, ears, limbs and a stitched face - many joined parts. Complex object 6 - Wooden paddle hairbrush: a flat wooden body with a handle and a cushion full of metal pins.

Design Challenge 2

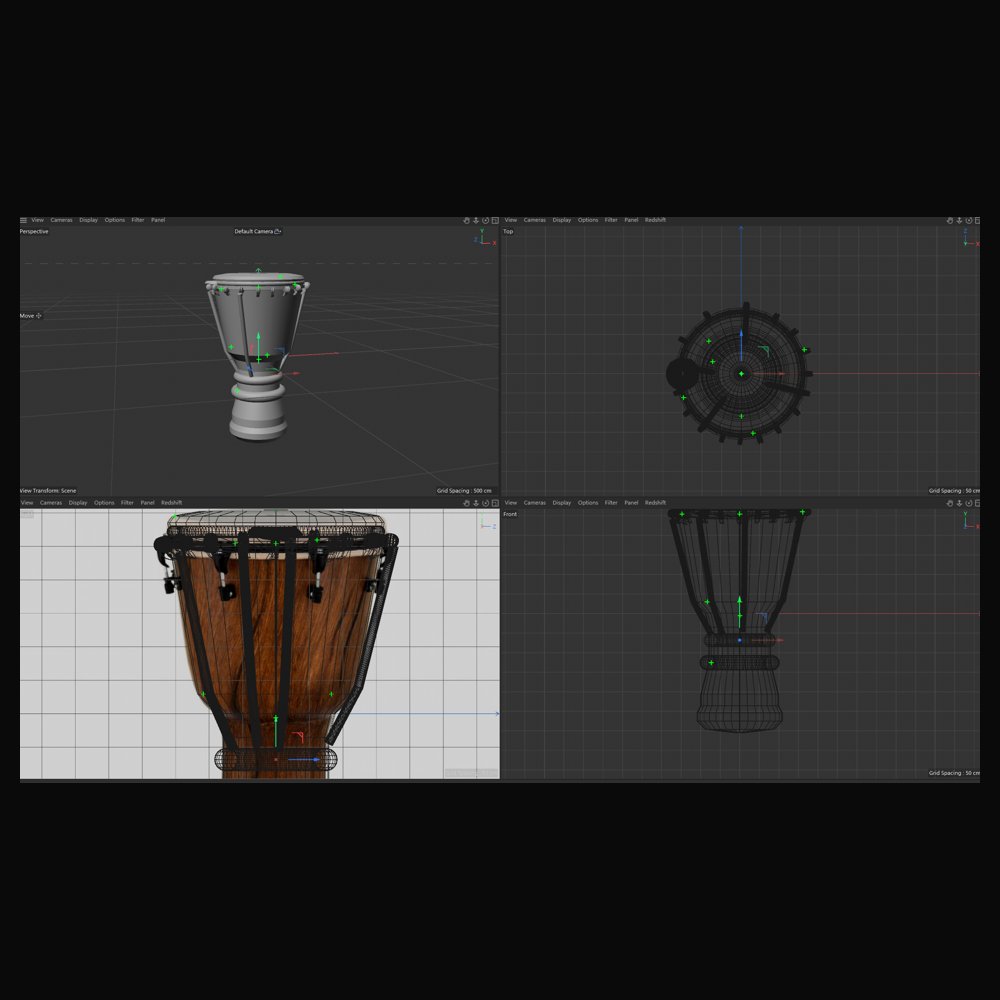
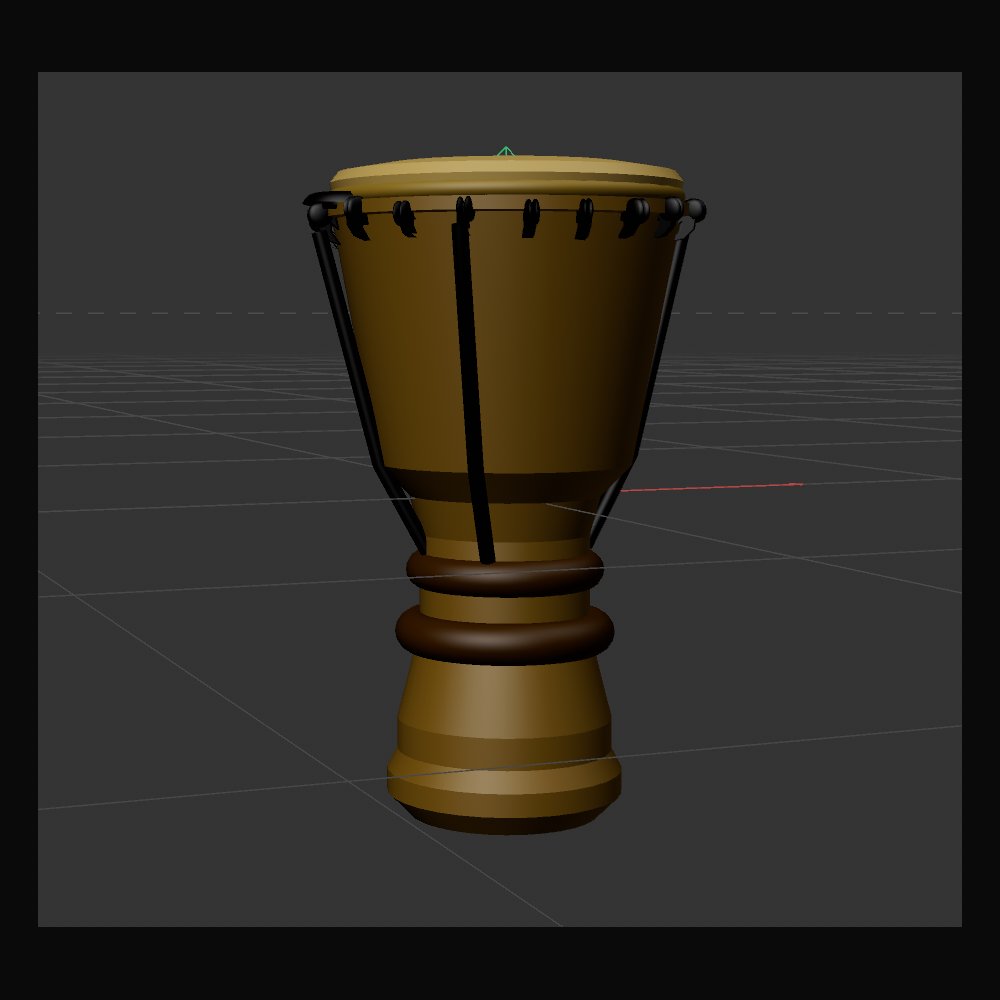
3D Modelling and AI Modelling: I first generated my complex objects with Tripo AI from my own photos (rows 1-2: Rilakkuma plush and game controller), then focused on modelling by hand in Cinema 4D following Tutorials 4-6. Row 3 has the controller result, the drum's Lathe start, Tutorial 4 practice and a failed Boolean; row 4 is the controller process step by step, box-modelled with Symmetry + Subdivision Surface using my AI renders as reference; row 5 is the djembe drum from hooks and ropes to materials. Click any image for a description.
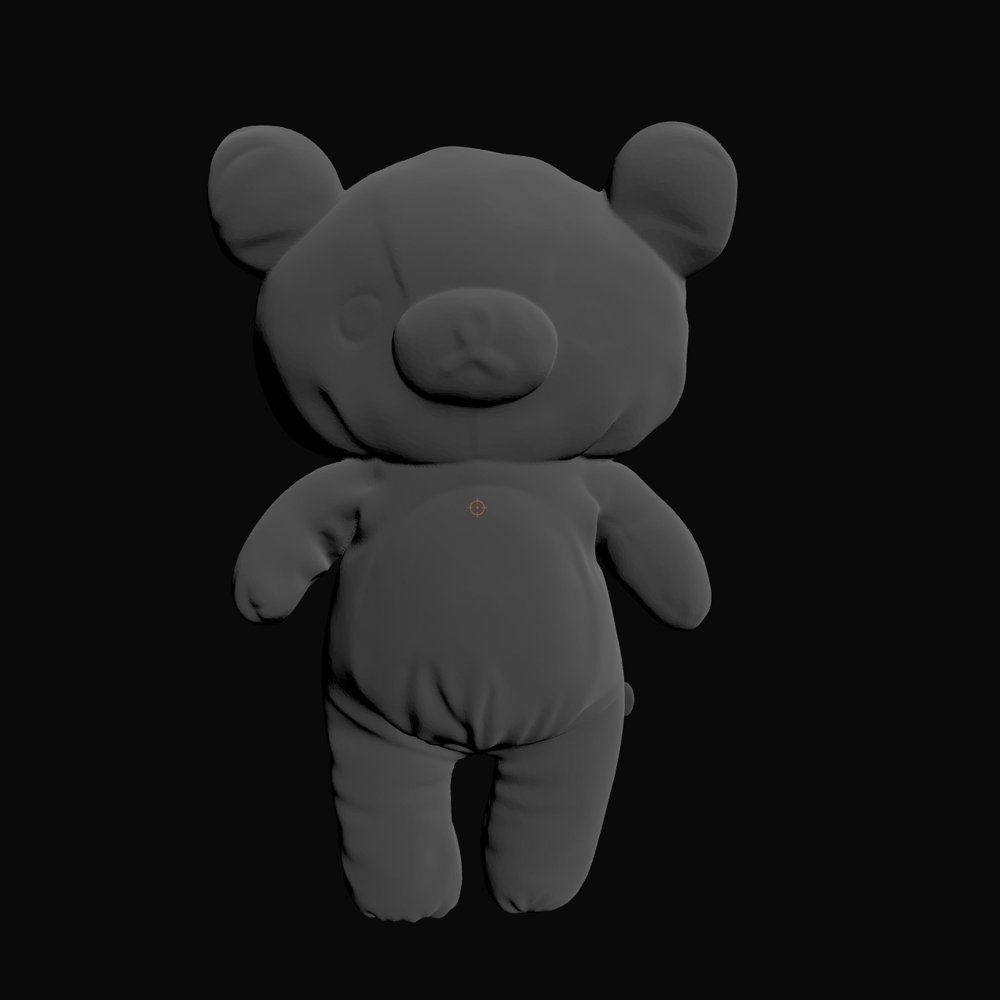
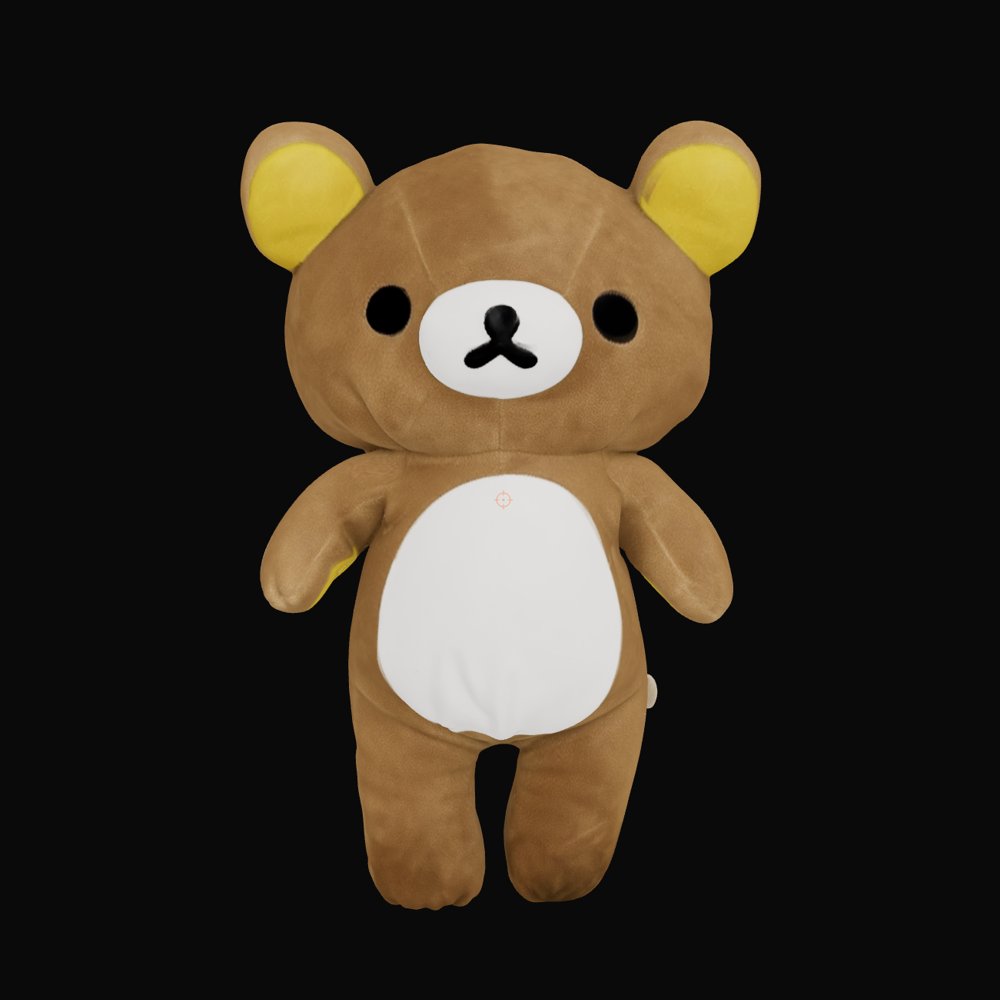
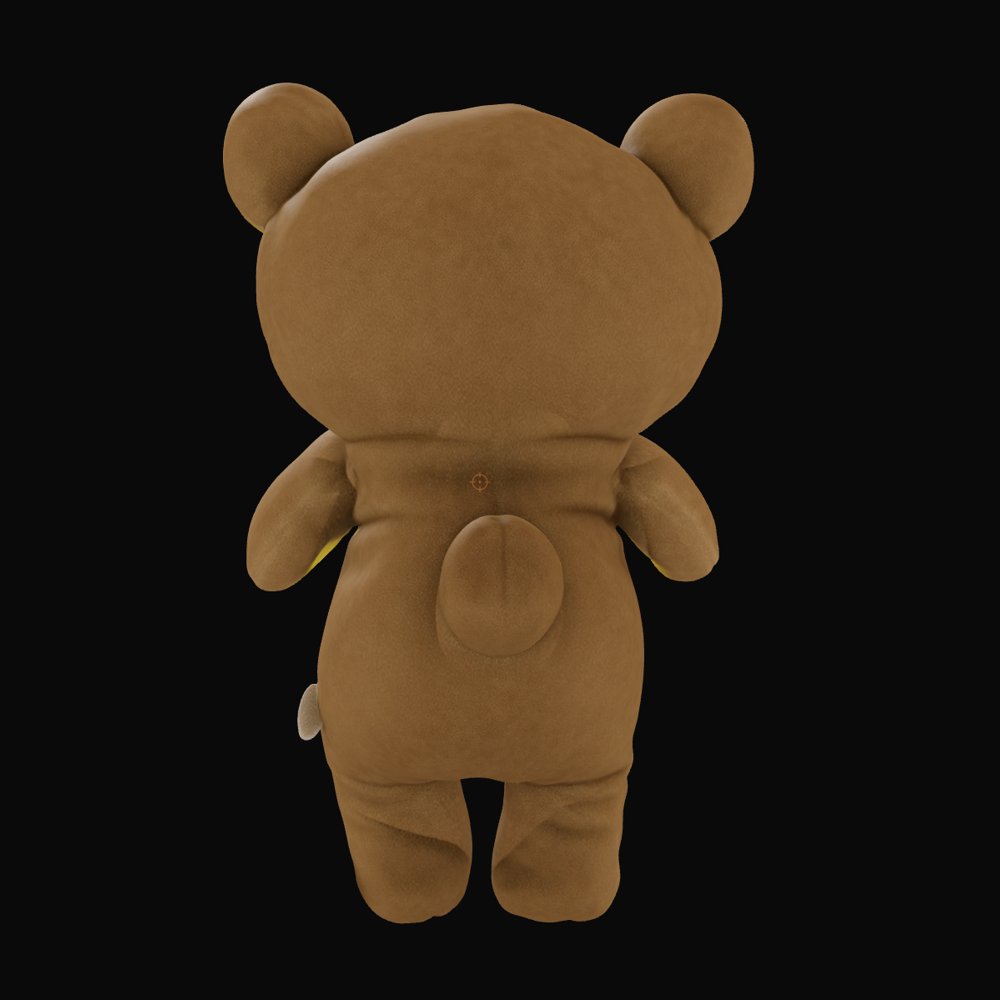
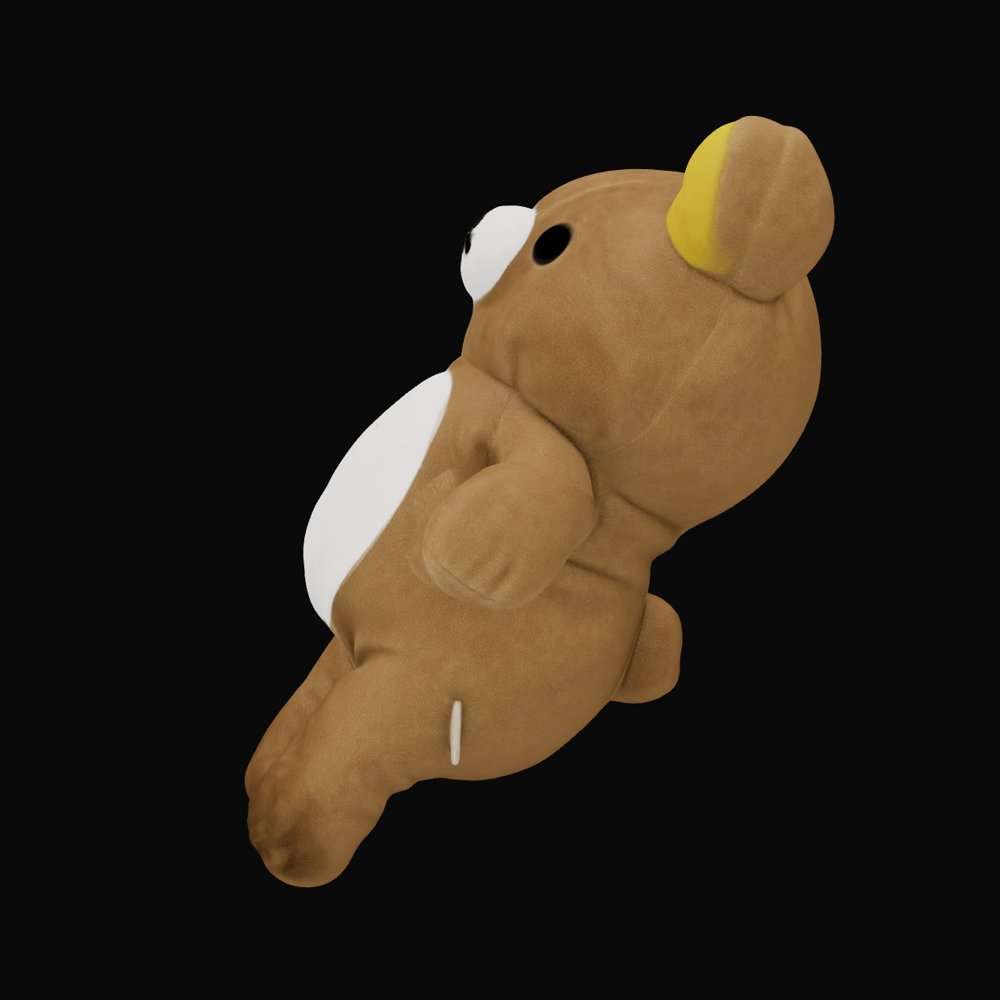
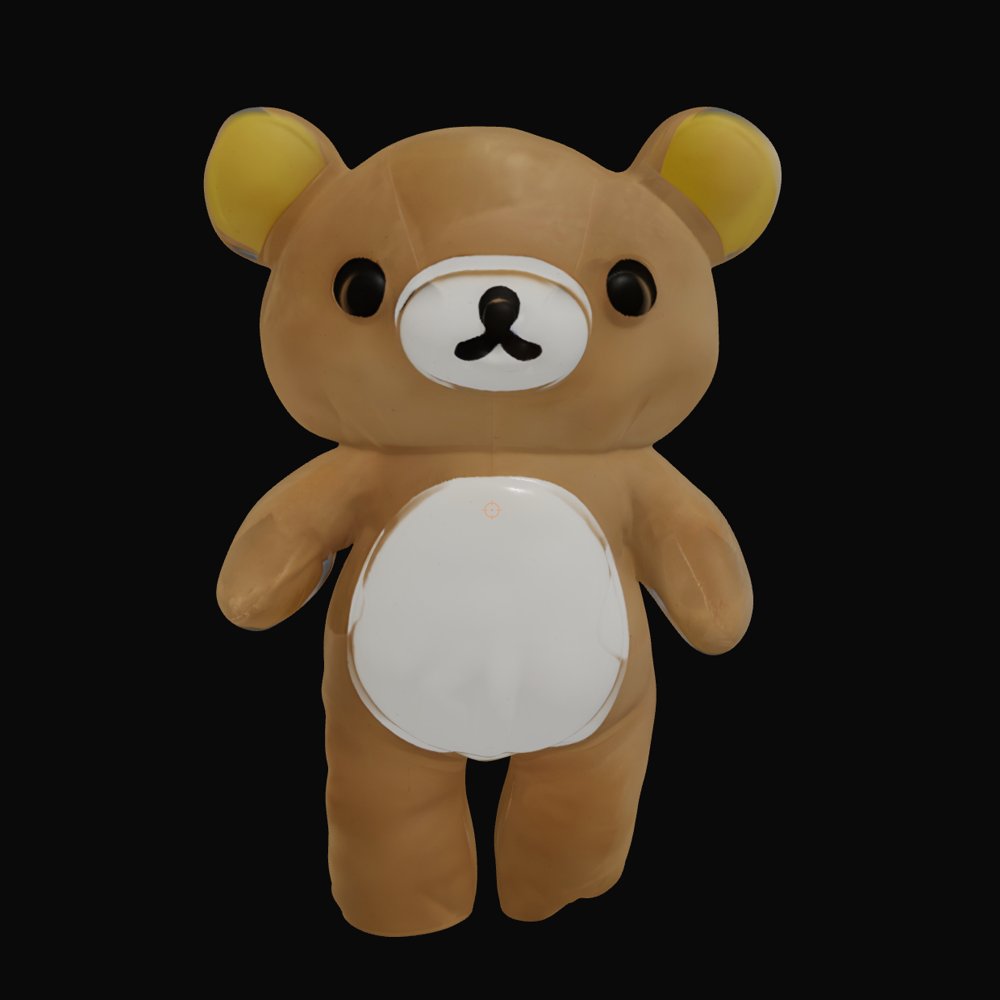
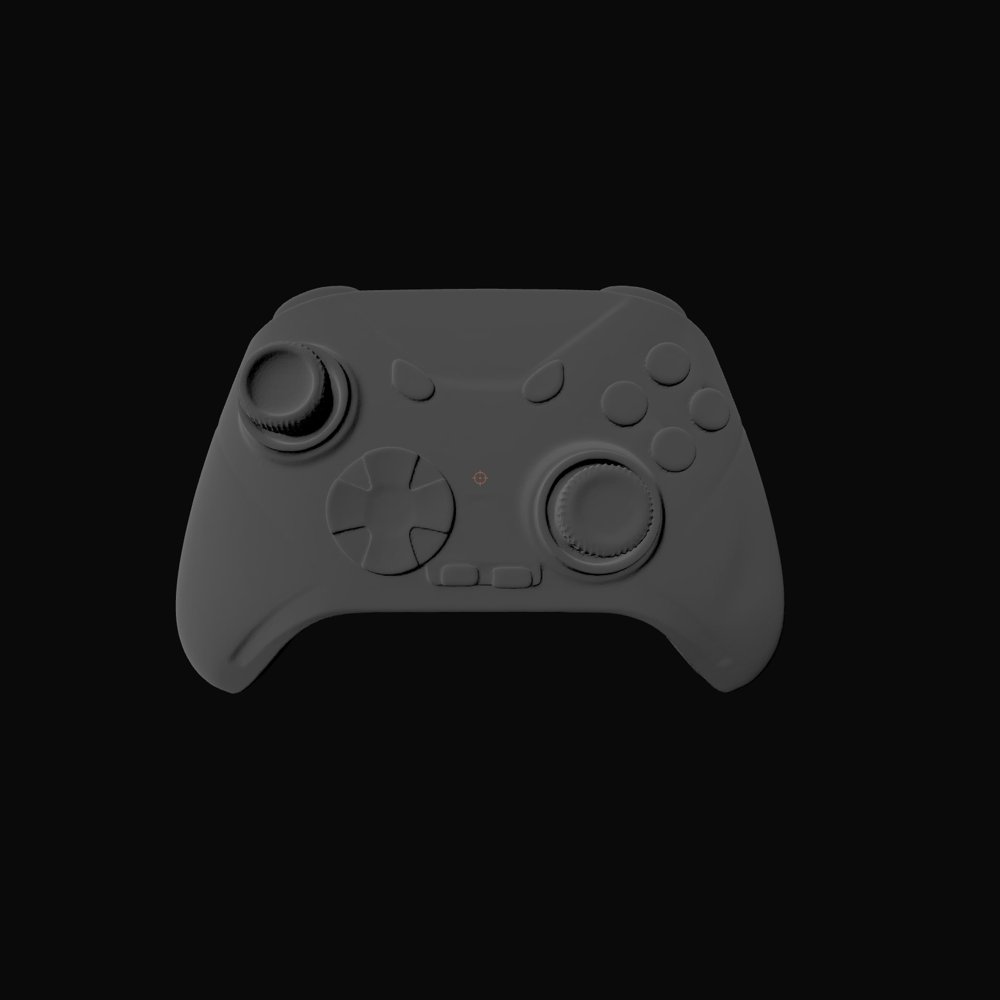
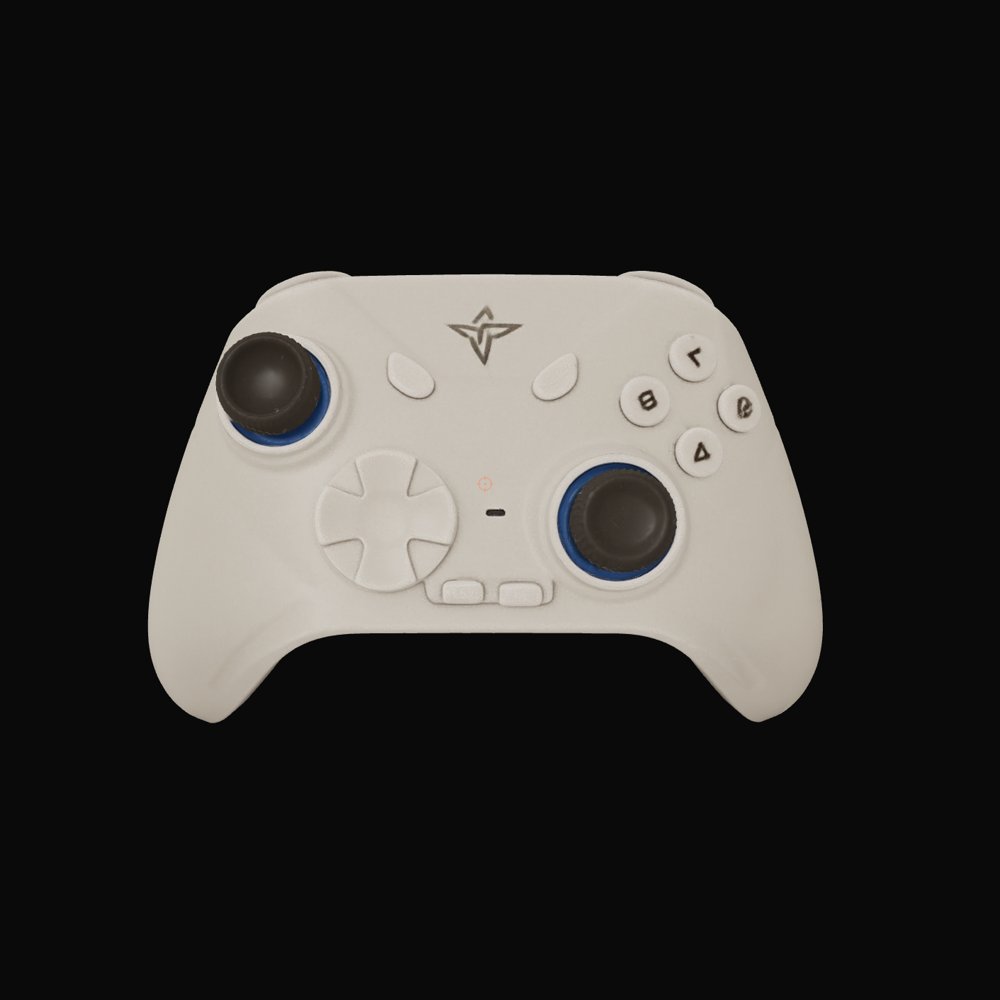
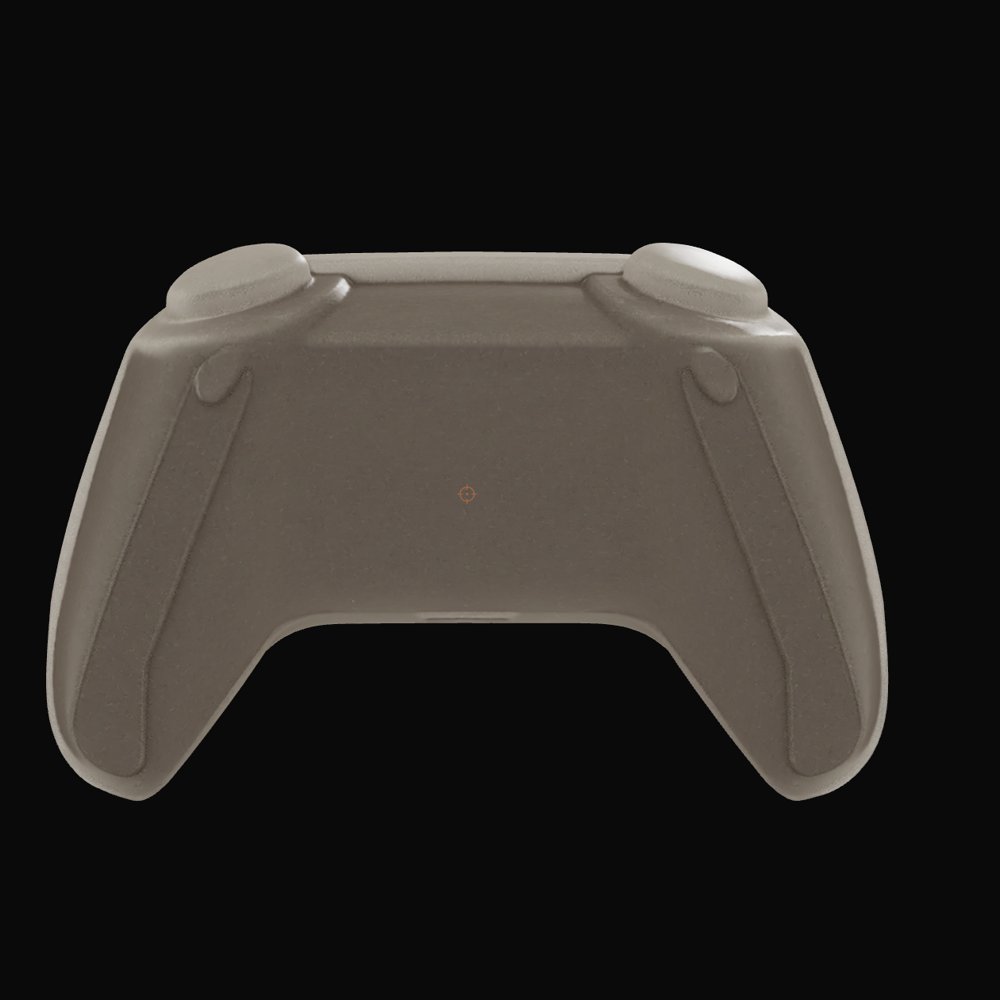
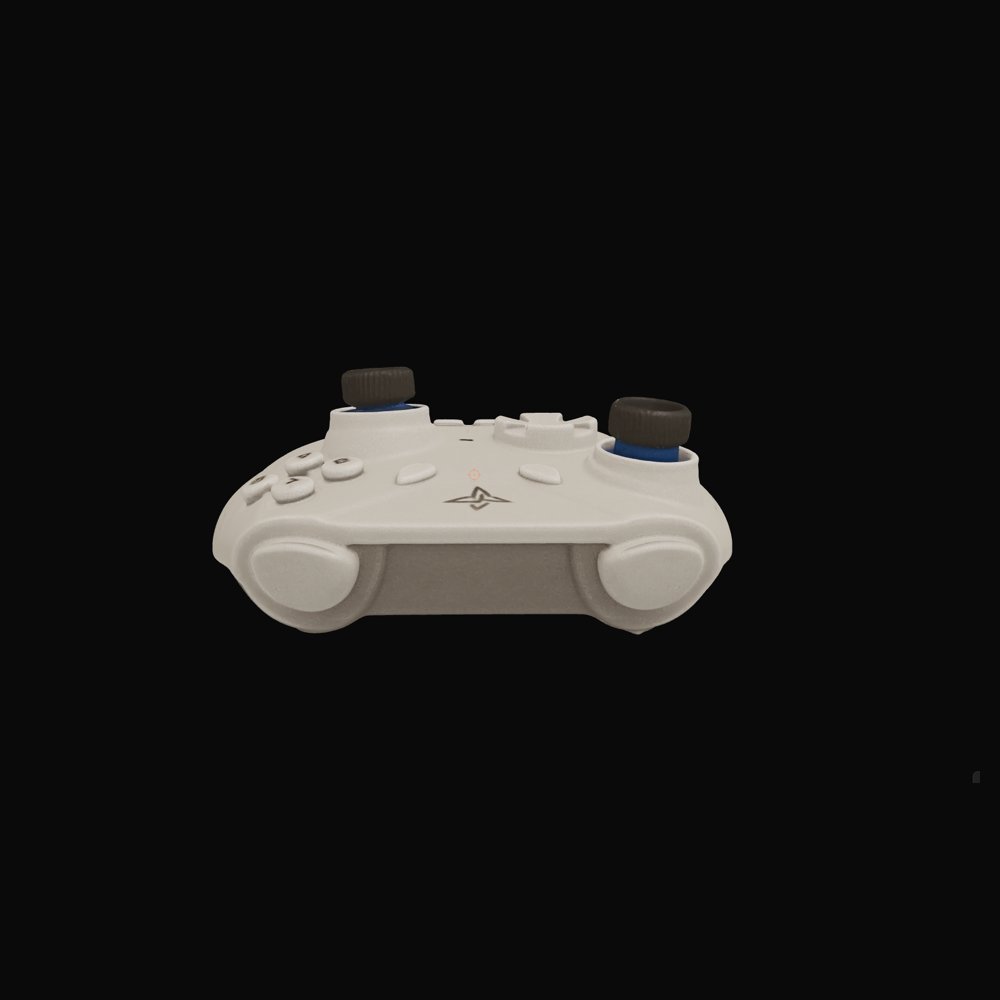
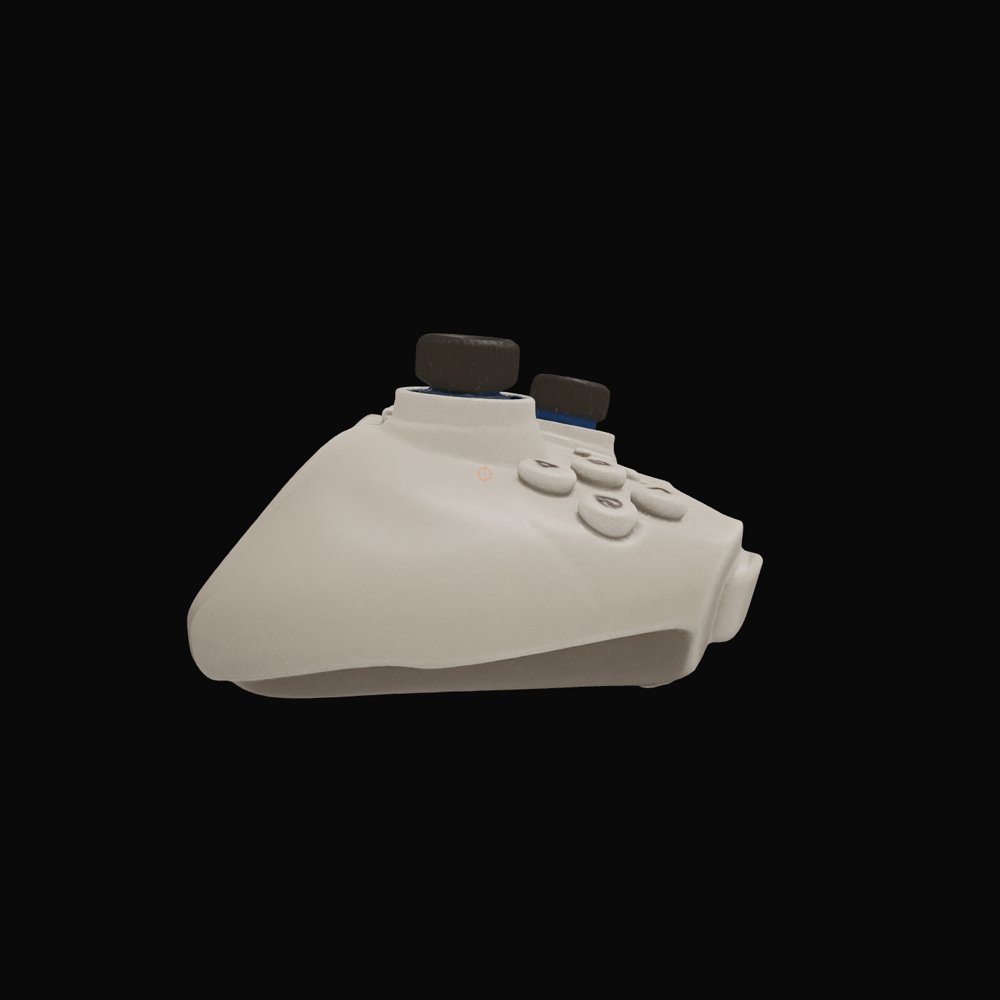
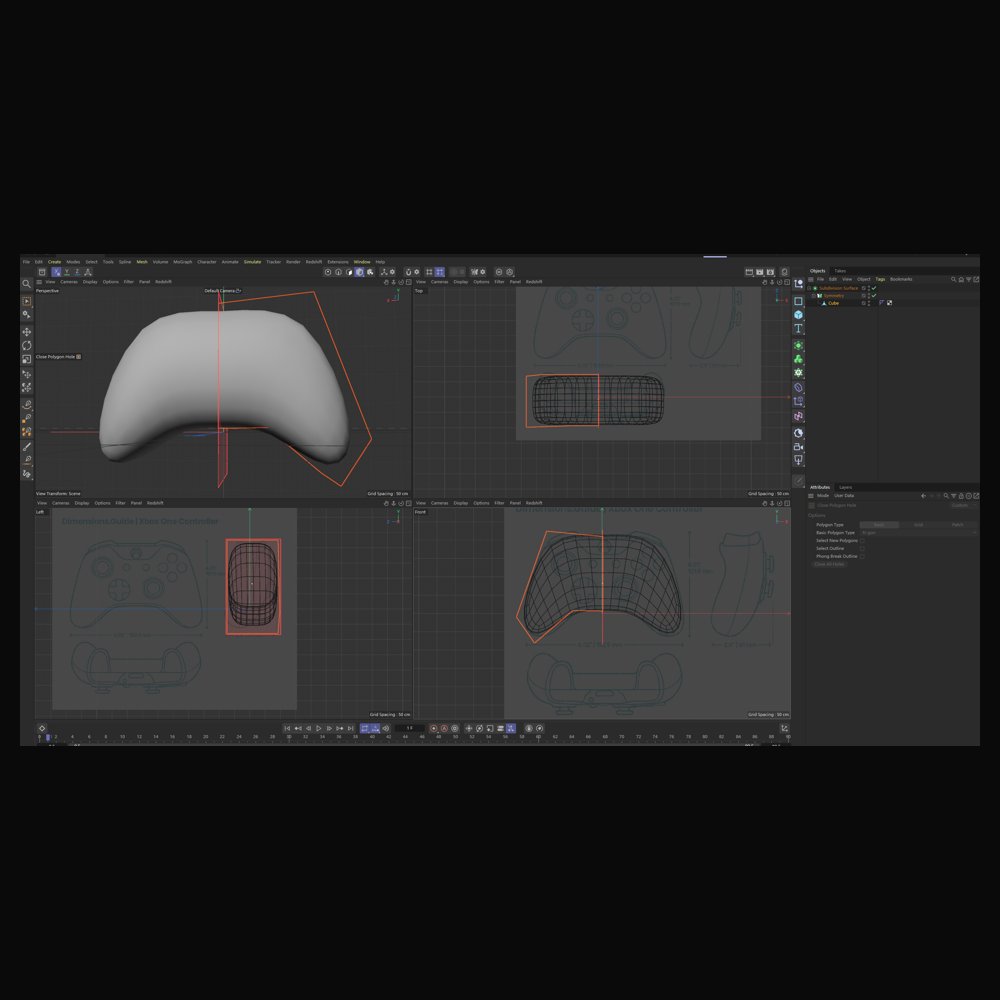
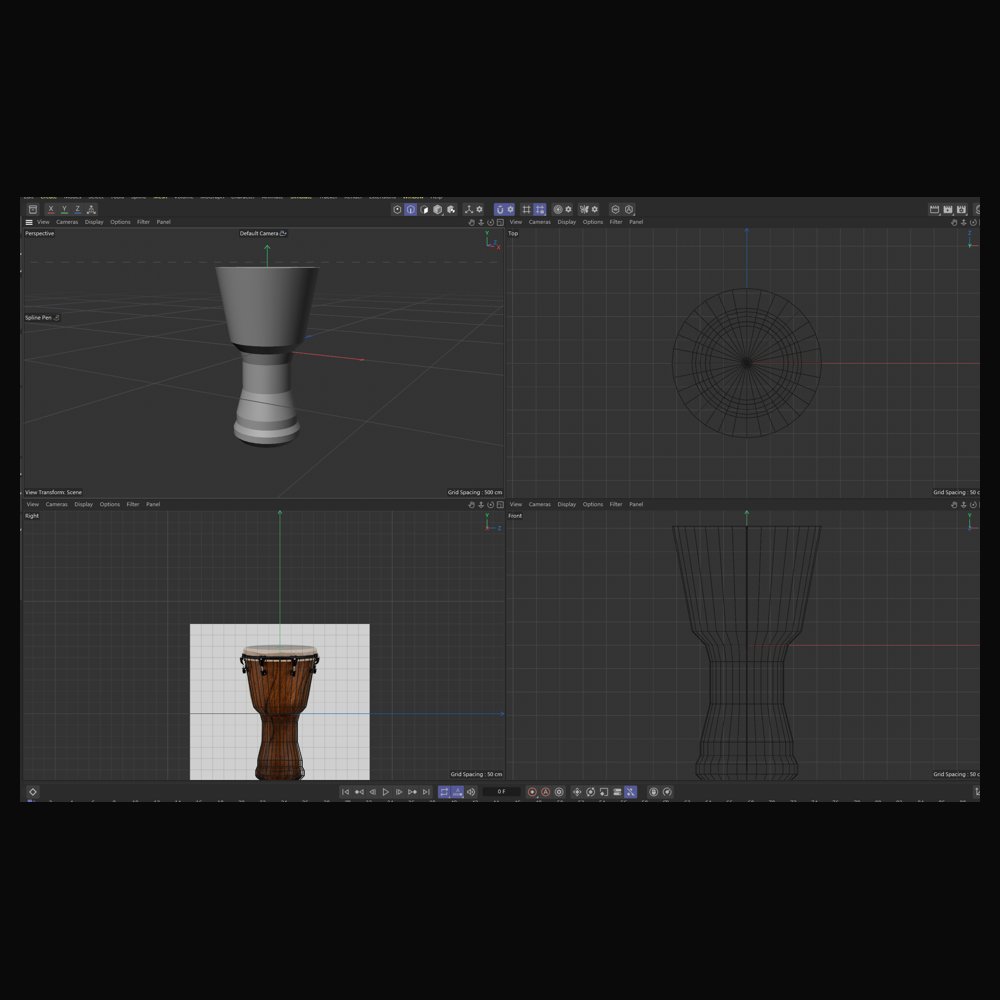
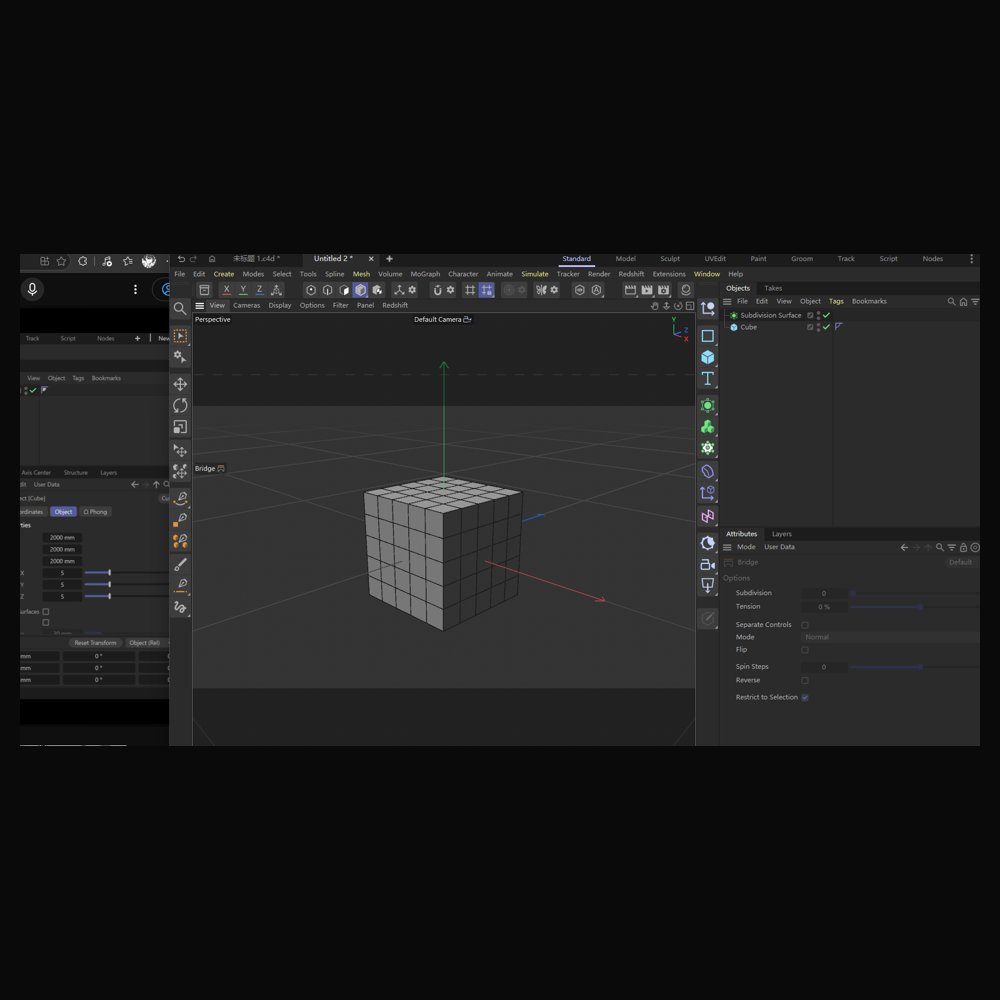
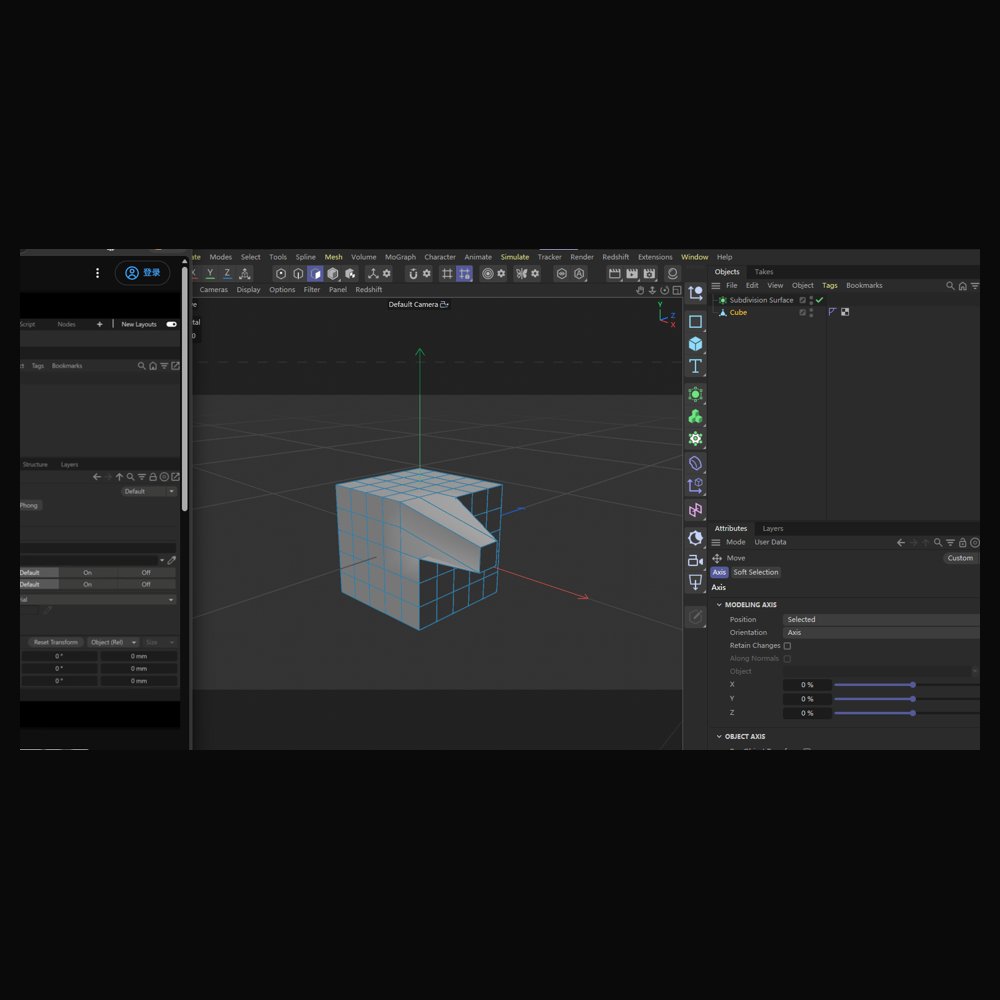
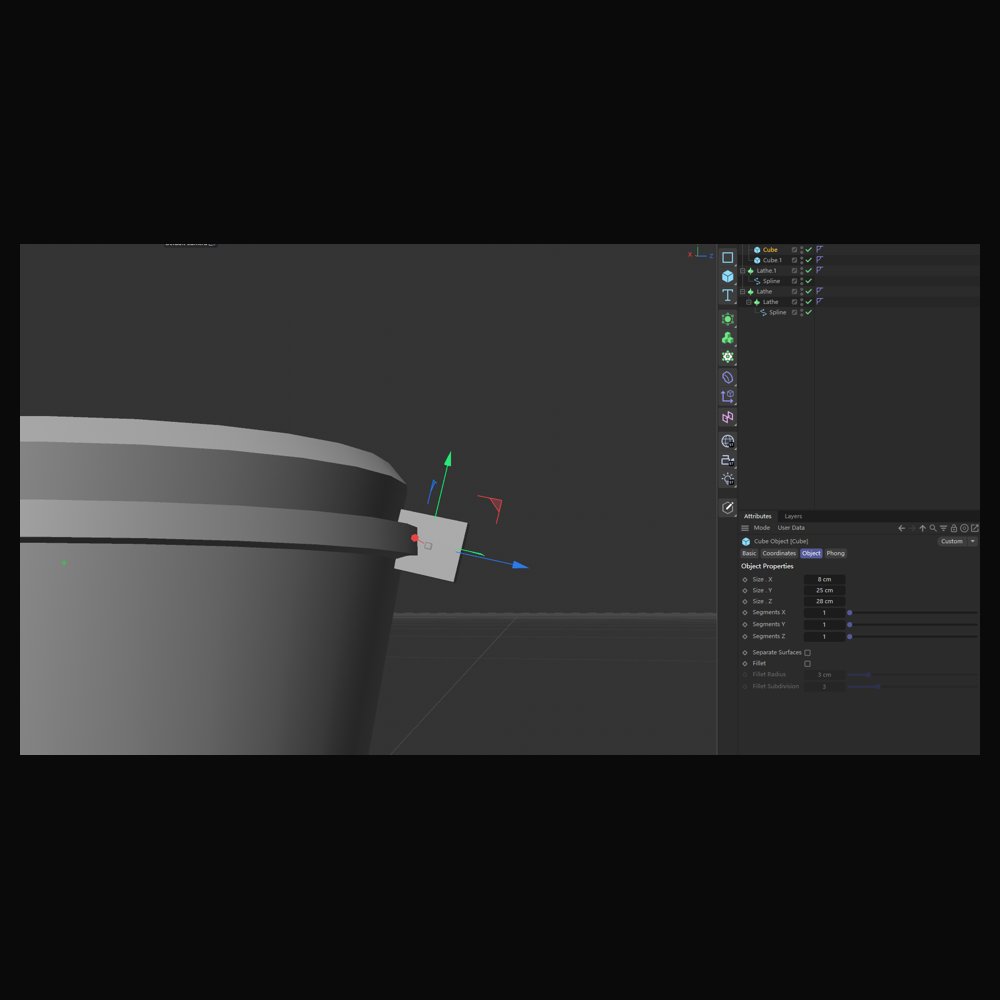
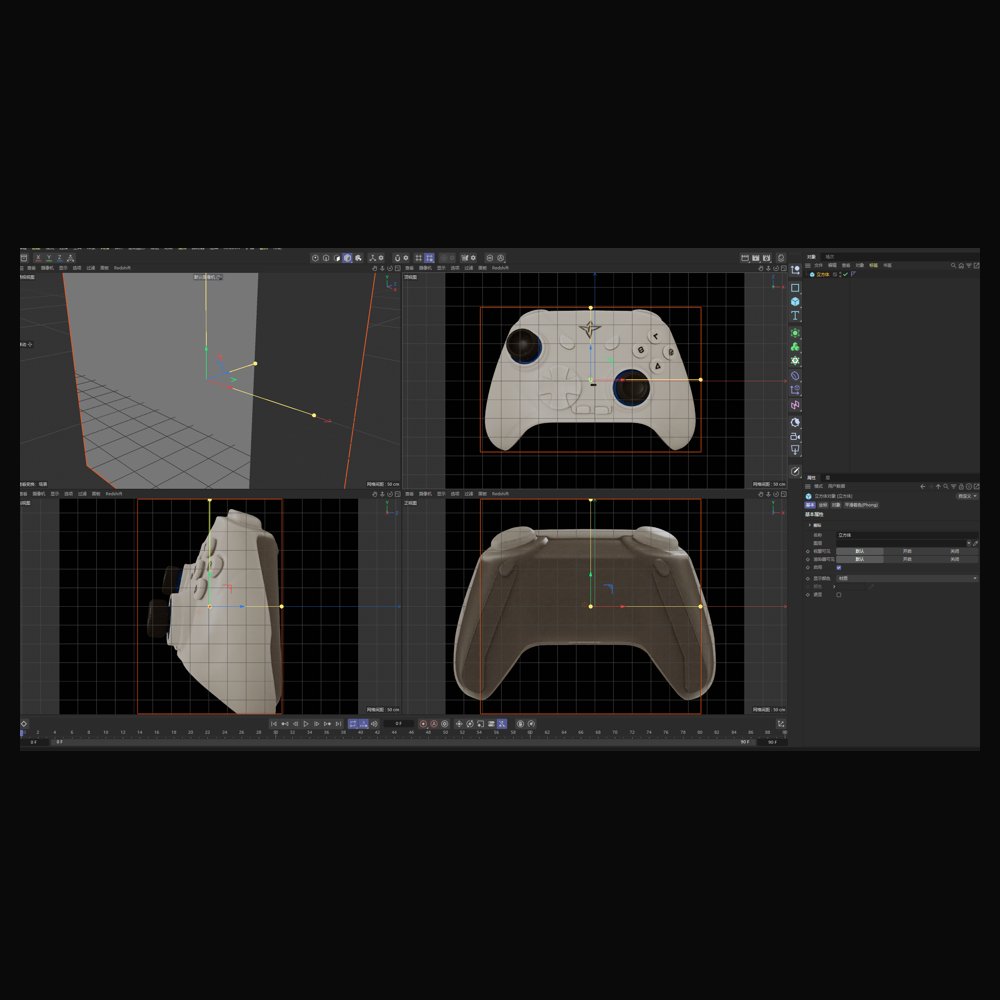
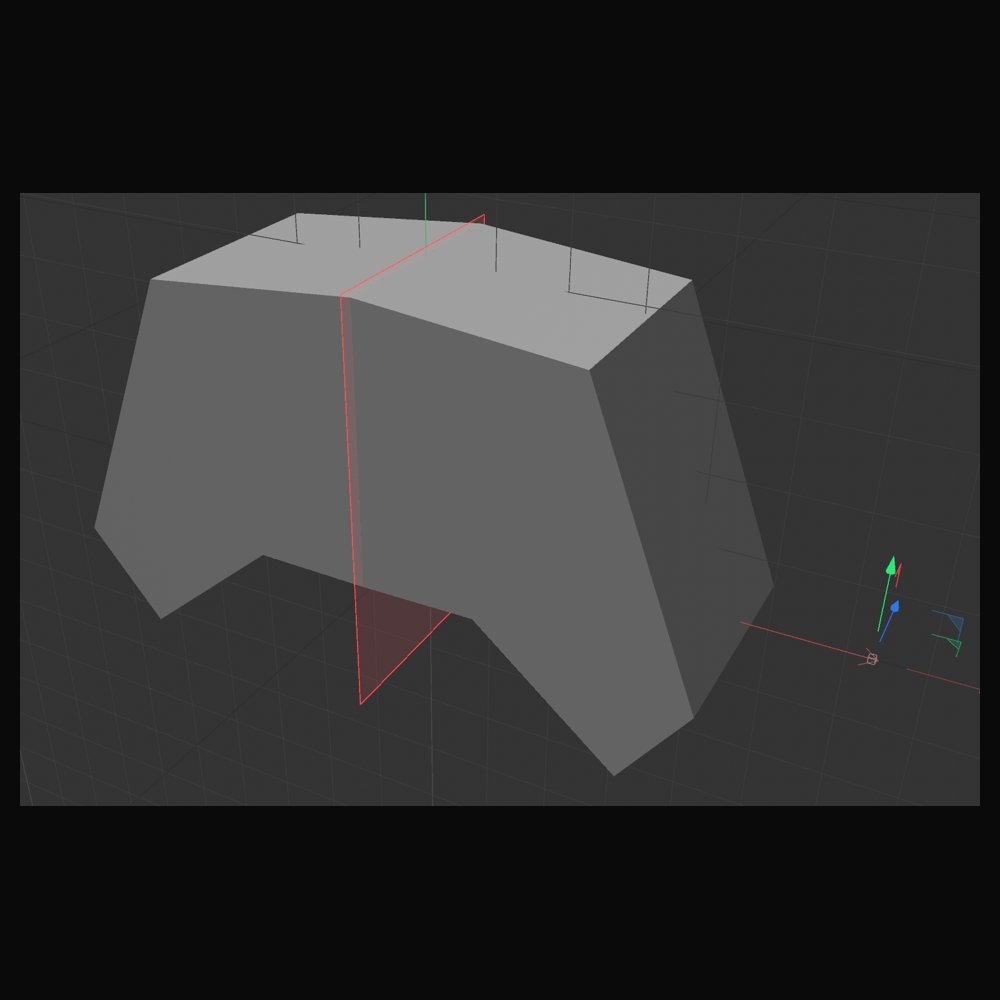
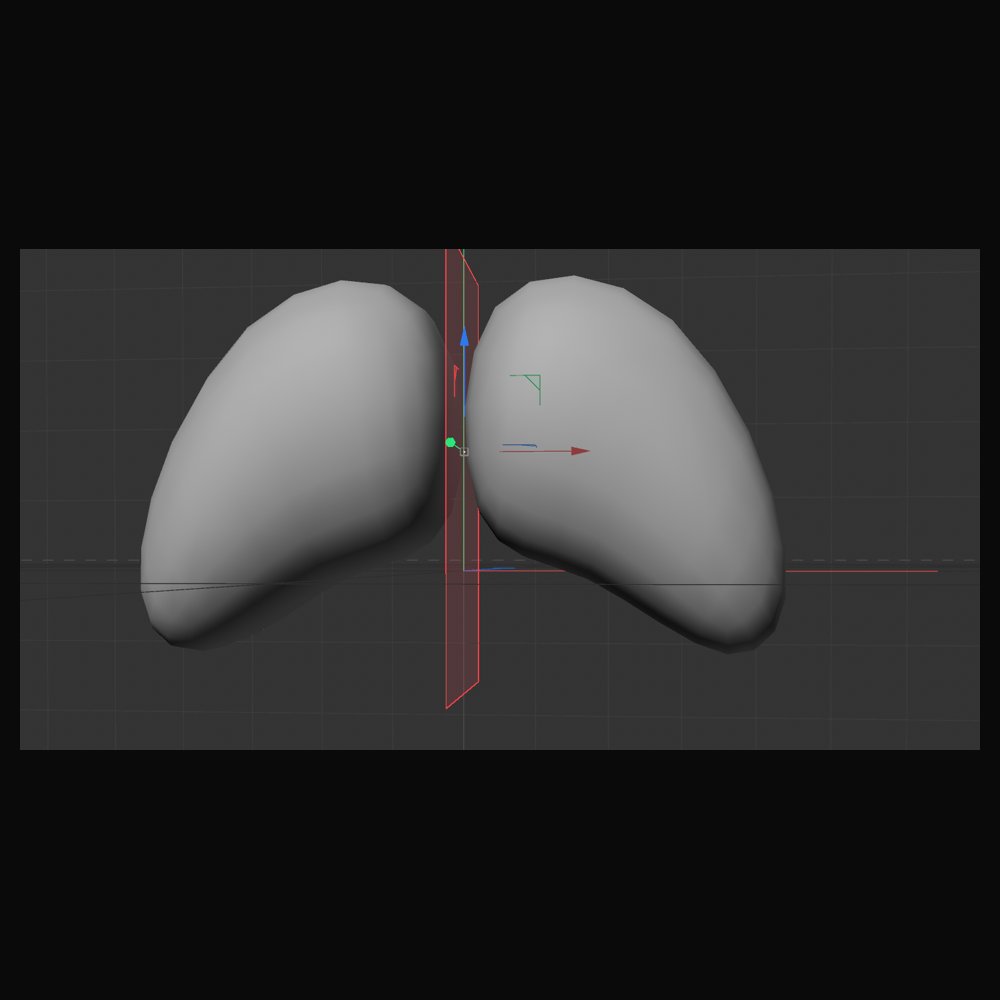
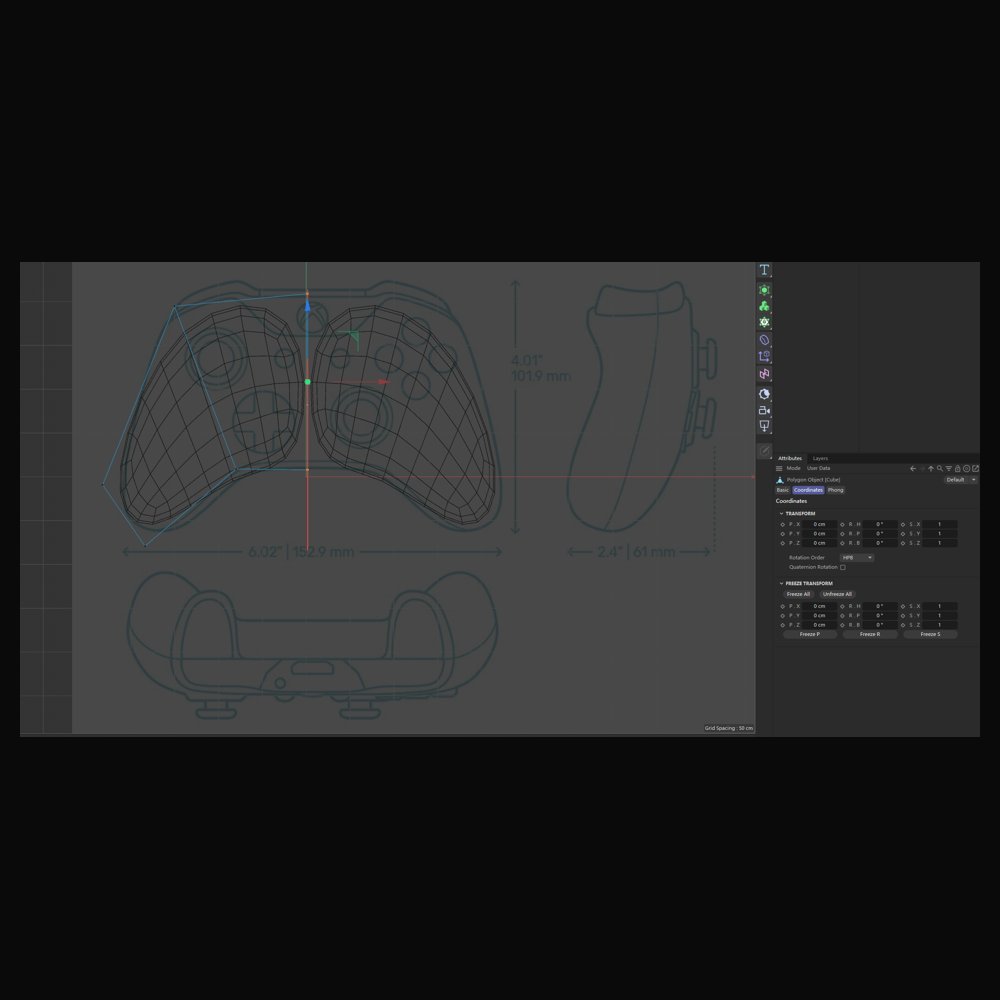
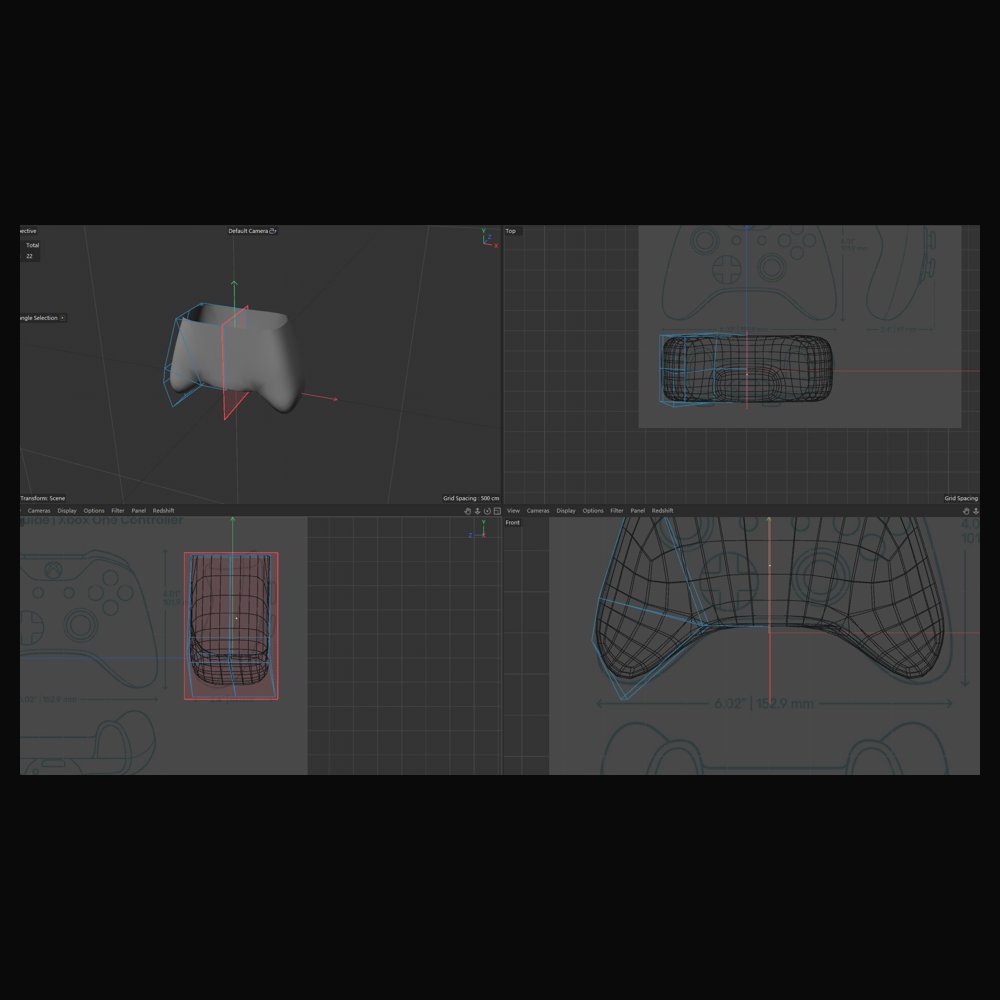
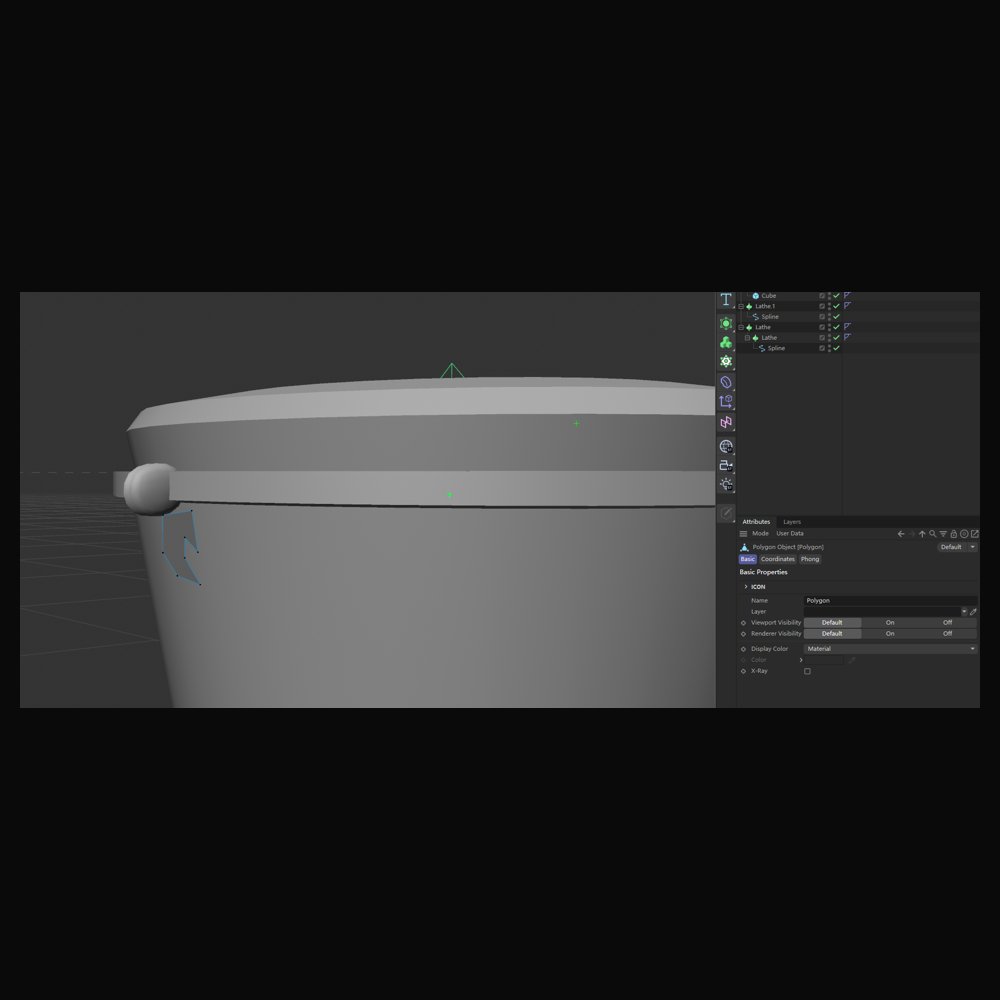
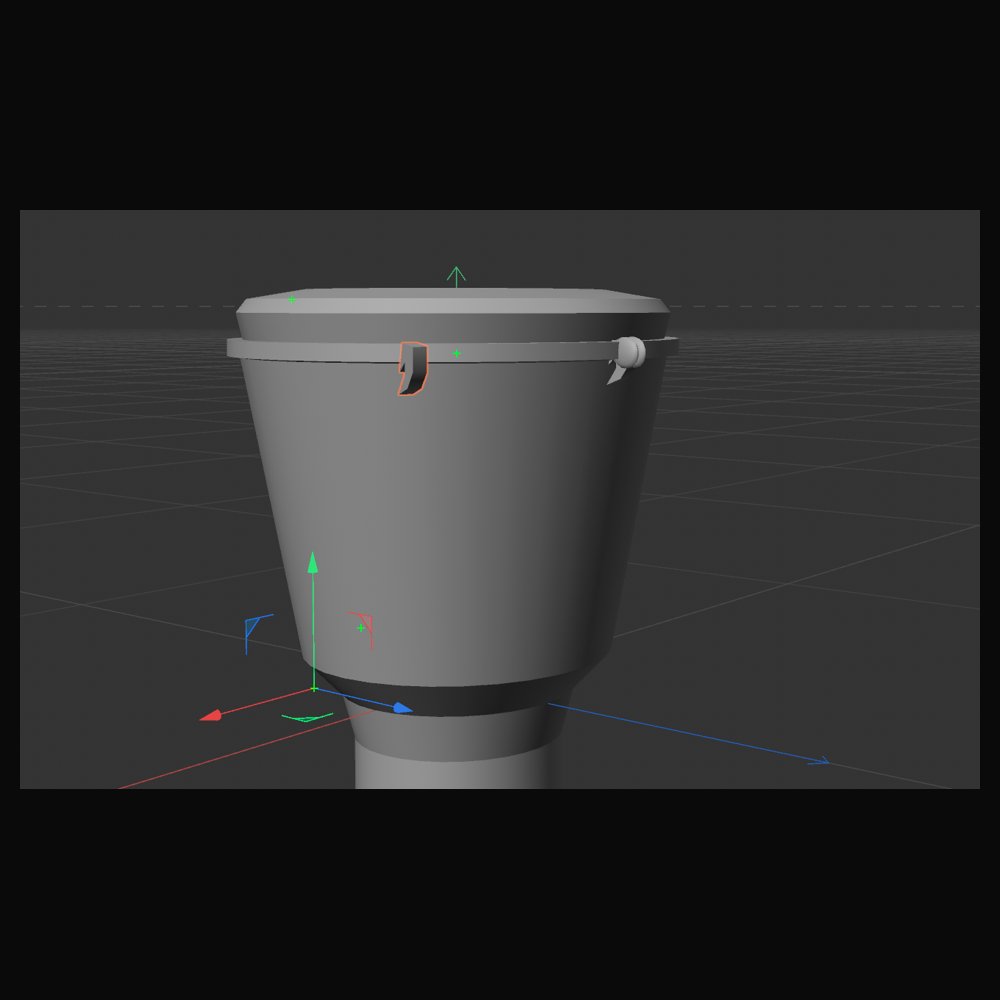
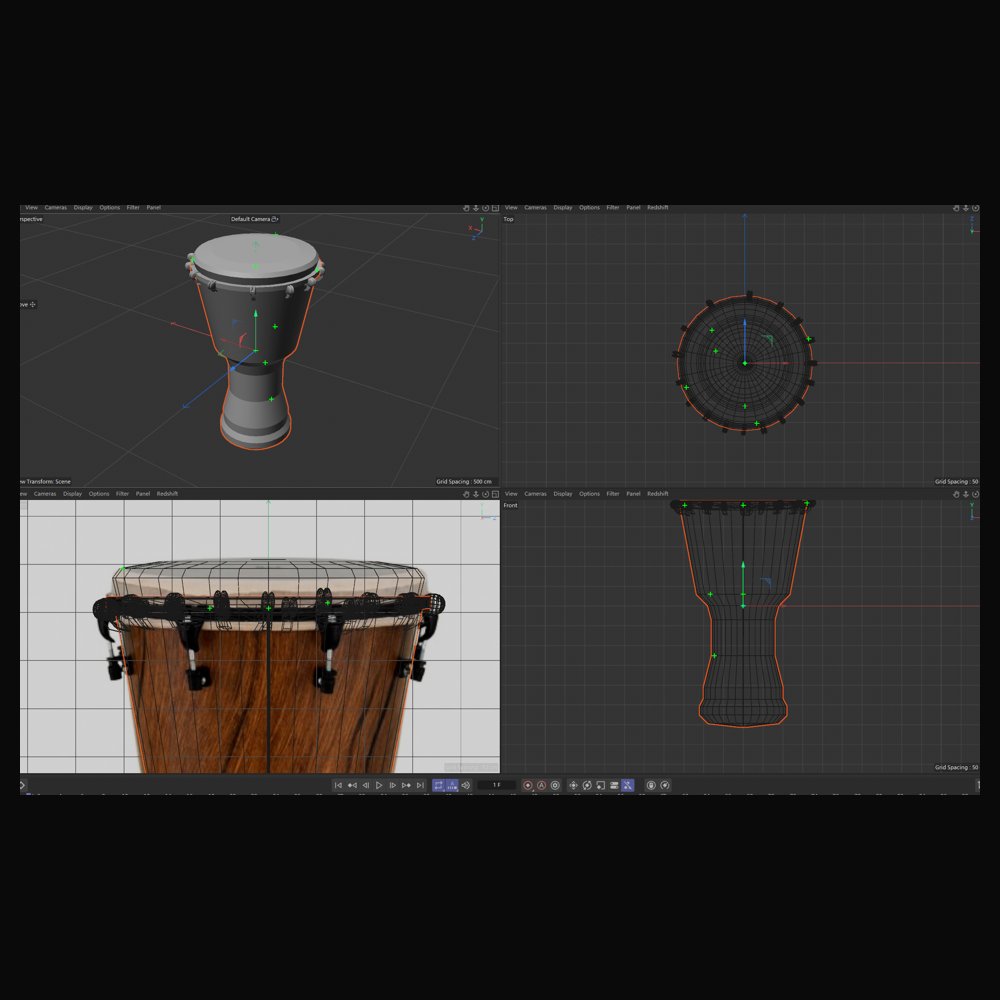
Object 1 (Rilakkuma plush) - Step 1: untextured grey mesh generated by Tripo AI from a single photo. The AI reconstructed the head, ears, belly and limbs as one closed mesh in a couple of minutes. Seams and stitching on the fabric are already visible in the geometry. Object 1 - Step 2: same mesh with the AI-generated PBR texture applied. Colours match the real toy (brown body, yellow ears, white belly). The face was reconstructed correctly from the reference photo. Object 1 - Step 3: back view. The AI guessed the unseen side: the tail and the back seam are plausible even though the reference photo was taken from the front. This is the main advantage of AI modelling for organic shapes. Object 1 - Step 4: angled view. Here the flaw shows: the white face patch and one eye were smeared onto the side of the head, because the AI only had one viewpoint to work from. This is a limitation I documented rather than fixed. Object 1 - Step 5: the same photo run through a different AI model in Tripo. The texture is brighter and the edges are harder than the first result. Comparing two models on one photo showed how much the generator itself changes the output. Object 2 (wireless game controller) - Step 1: untextured grey mesh from Tripo AI. Both thumbsticks, the D-pad, the four face buttons and the two small centre buttons were all reconstructed as separate raised details. Hard-surface products came out cleaner than the plush toy. Object 2 - Step 2: textured front view. The blue rings around the thumbsticks and the logo on the body were picked up from the photo. Button labels are slightly mirrored/blurred, which shows the AI reads them as texture, not as real letters. Object 2 - Step 3: back view. Shoulder bumpers, triggers and the grip contours were inferred without a back photo. The shape is convincing but simplified compared with the real controller. Object 2 - Step 4: side view. This angle shows the thickness of the body and the tilt of the thumbsticks. I used Tripo renders like this one as background references inside Cinema 4D later. Object 2 - Step 5: low angled view from the grip end, opened as a GLB in a 3D viewer app. Good for checking how the grips taper. The mesh is smooth and closed. Controller (a): four-view result of the first C4D pass. Subdivision Surface > Symmetry > Cube gives a smooth, symmetrical body from only a few low-poly points - the box-modelling workflow from Tutorial 5. The step-by-step process is in row 4. Drum (a): Lathe (Tutorial 5). I traced half of a djembe's outline with the Spline Pen in the Right view over a reference photo, then the Lathe generator rotated it 360 degrees around the Y axis. Front view shows the wireframe, Top view shows the radial segments. Tutorial 4 practice (Editing Objects) - a Cube primitive with Segments X/Y/Z set to 5, following the Module 1 Tutorial 4 video. More segments means more points to edit and smoother results when deformed. Tutorial 4 practice - the same cube after Make Editable (C), then selecting and extruding a face in Polygon mode. Unlike a deformer this change is permanent and the cube can no longer be edited parametrically, which is why the tutorial recommends copying the primitive first. Drum (b): first attempt at a tuning hook with a Boolean (Tutorial 4). A cube for the hook block and a smaller cube as a cutter inside a Boolean set to Subtract. It did not work at first - the cutter was still outside the block and the child order was reversed - and even when fixed the result was too boxy, so I tried a different approach. Controller - Step 1: reference setup. I used my own Tripo AI renders of the controller as background images in the Top, Right and Front views, then sized a cube to match the controller body. This connects the AI model to the hand-modelling process. Controller - Step 2: low-poly block-out. After Make Editable I moved points in the Front view to trace the outline, deleted the left half, and let a Symmetry generator mirror the right half. Controller - Step 3: first try with Subdivision Surface. The model split into two lobes because the Symmetry object had been moved off centre and the middle points were not on the mirror plane. Fixed by zeroing the Symmetry coordinates and enabling Weld Points. Controller - Step 4: wireframe view with Subdivision Surface on, shown over a controller blueprint in the Front view. This is where I could see the mesh was splitting in the middle and check how the grips should flow out of the body. Controller - Step 5, later stage: the body now has real thickness. I switched the background references to an Xbox One controller blueprint from Dimensions.com (152.9 x 101.9 x 61 mm) to check proportions in Top, Right and Front. The grips flow out of one subdivided mesh; buttons and sticks are still to come. Drum (c): second approach. I drew the hook's side profile as a single flat polygon with the Polygon Pen, tracing the curved hook shape from the reference photo. A Sphere was added as the nut above it. Drum (d): gave the flat hook thickness with Extrude (Create Caps on). At first nothing seemed to happen because 8 cm was tiny next to the drum and I was looking at it edge-on; once I checked the Grid Spacing and raised the offset the hook appeared. Drum (e): hooks and nuts repeated around the rim. One hook + nut was copied and rotated with the H value so they sit evenly around the drum (Top view shows the radial layout) - the hierarchy / duplicate workflow from Tutorial 4. Drum (f): tension ropes made with a Sweep (a small Circle swept along a Spline) and copied around the body the same way as the hooks, plus a Torus ring at the waist. Right view shows the ropes lined up against the reference photo. Drum (g): materials (Tutorial 6). Separate materials for each part: a wood texture on the shell, a lighter tan on the head, dark brown on the rings and black on the hooks and ropes. Getting the wood onto the upper shell took a few tries because the drum was built from nested Lathe objects and the material tag had landed on the wrong one.

Full 5x5 grid submitted to SLATE:
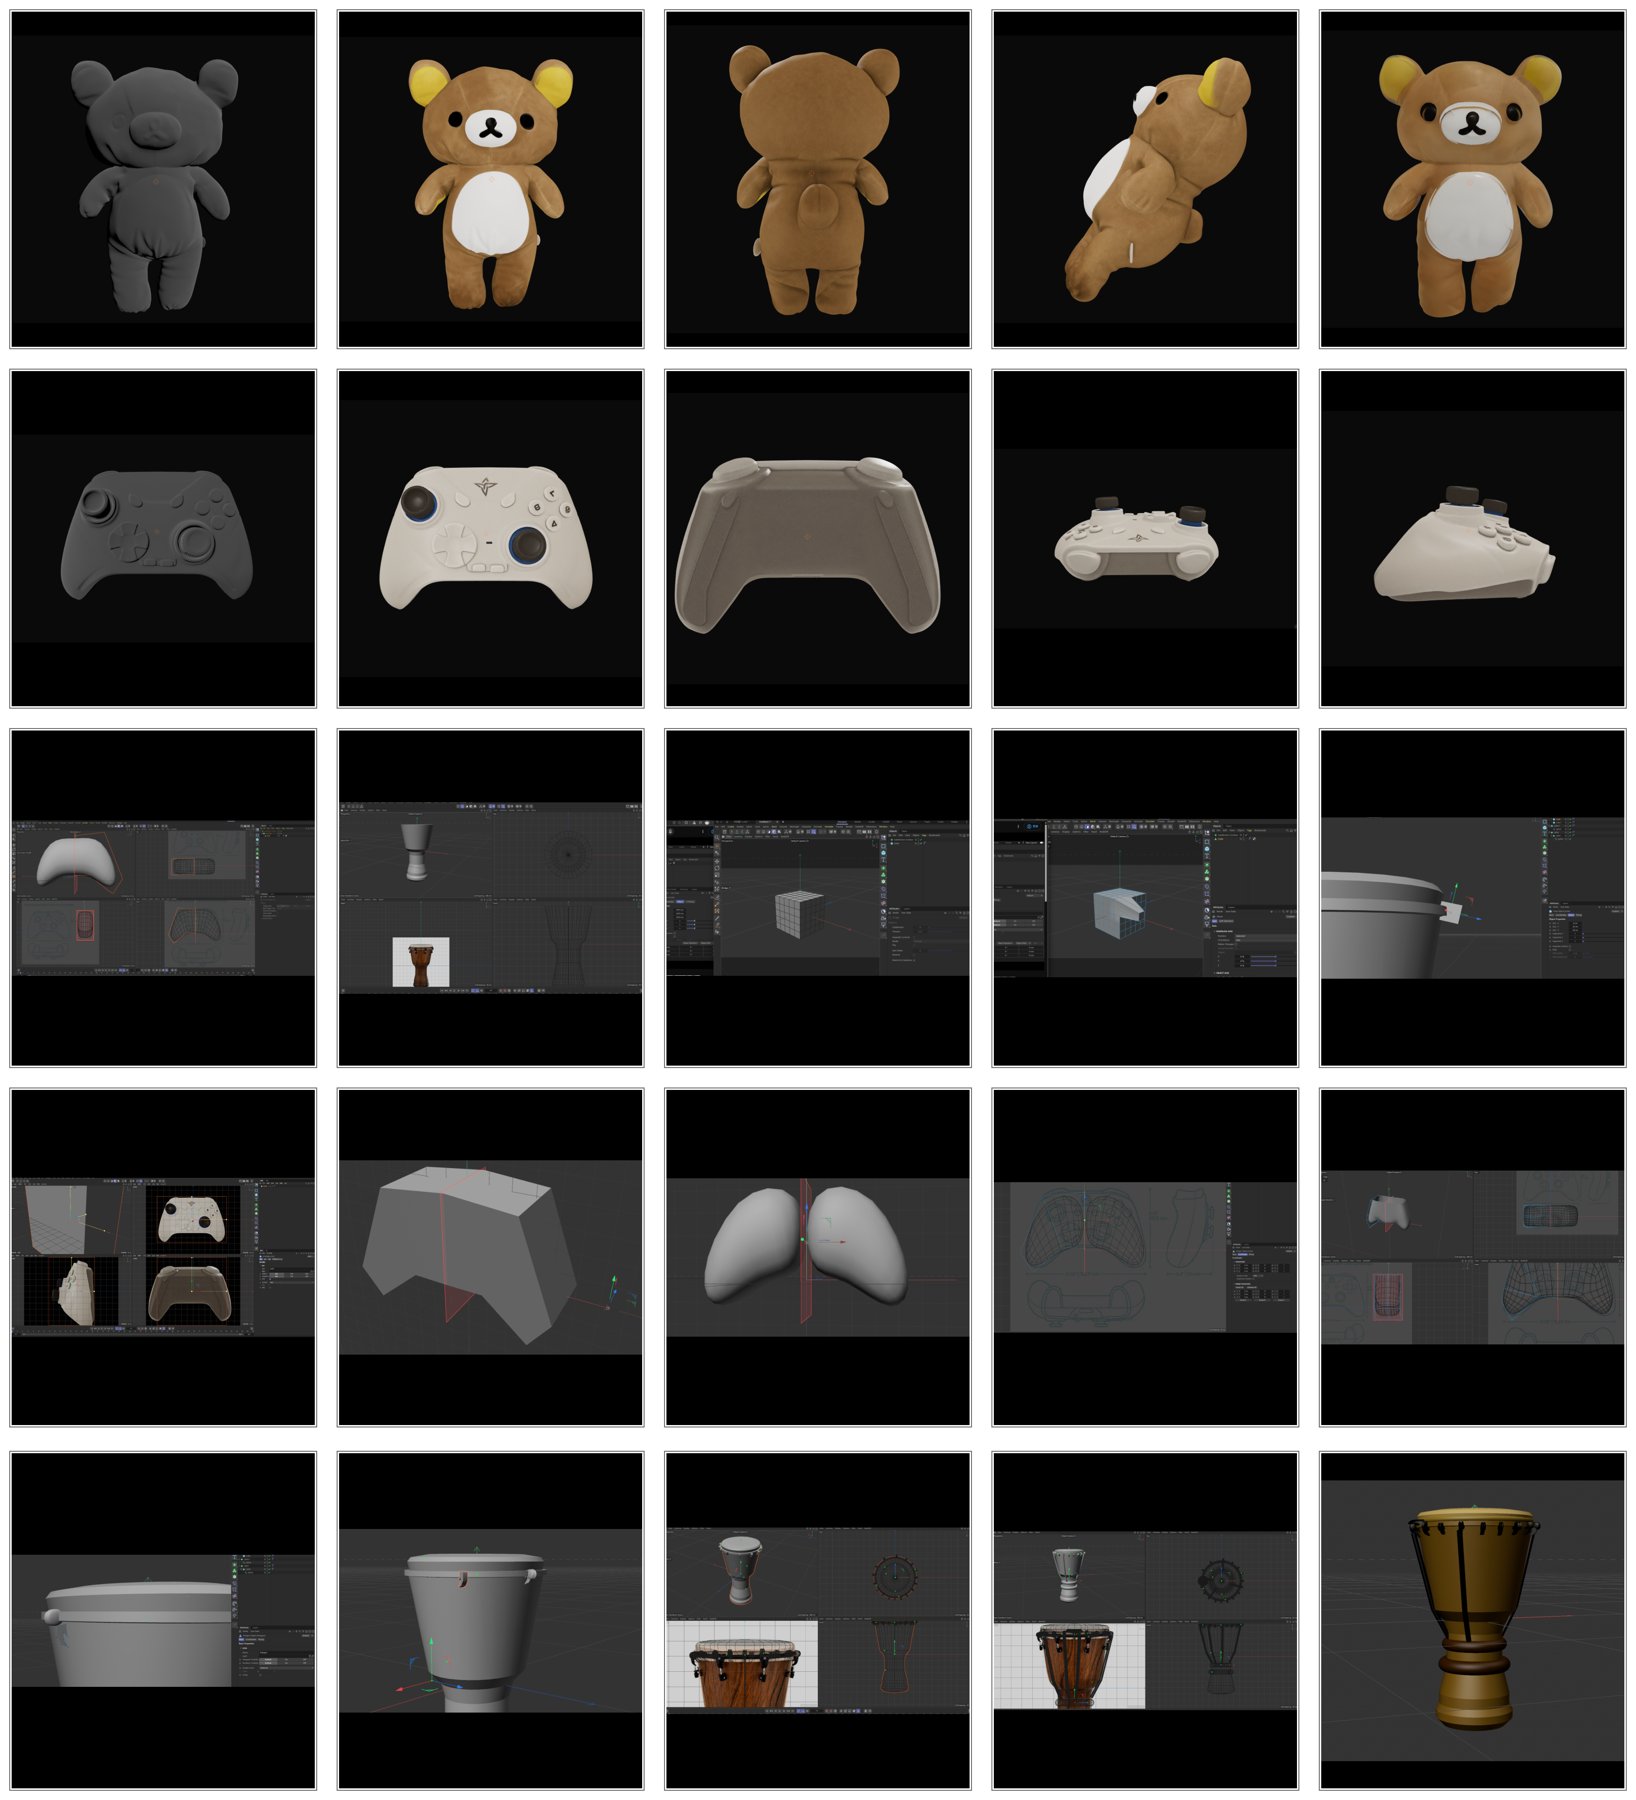
Design Challenge 2 - the complete 5x5 grid of 25 images as submitted in the PDF.

Material Workshop 1

put a description here or you will lose grades<a href='https://www.youtube.com/embed/tgbNymZ7vqY' target='_blank'><p>Project Video Link</p></a> put a description here or you will lose grades <div class='container'><iframe class='responsive-iframe' src='https://www.youtube.com/embed/tgbNymZ7vqY'></iframe></div> put a description here or you will lose grades

Material Workshop 2

put a description here or you will lose grades <a href='https://www.youtube.com/embed/tgbNymZ7vqY' target='_blank'><p>Project Video Link</p></a> put a description here or you will lose grades <div class='container'><iframe class='responsive-iframe' src='https://www.youtube.com/embed/tgbNymZ7vqY'></iframe></div> put a description here or you will lose grades

Project 1


Project 1 Models

Published 3D Model 1

PLACEHOLDER TEXT, put a description here or you will lose grades
put a description here or you will lose grades <div class='container'><iframe class='responsive-iframe' src='https://hudak.phoenix.sheridanc.on.ca/P1Stuff/Index.html'></iframe></div>

Published 3D Model 2

PLACEHOLDER TEXT, put a description here or you will lose grades

put a description here or you will lose grades <div class='container'><iframe class='responsive-iframe' src='https://hudak.phoenix.sheridanc.on.ca/P1Stuff/Index.html'></iframe></div>

Published 3D Model 3

PLACEHOLDER TEXT, put a description here or you will lose grades

put a description here or you will lose grades <div class='container'><iframe class='responsive-iframe' src='https://hudak.phoenix.sheridanc.on.ca/P1Stuff/Index.html'></iframe></div>
x

Powered by w3.css